Square Payment Gateway for Formidable Integration

1.Introduction #
Formidable Plugin that allows admin to create payment form by form builder plugin and integrate with the square payment gateway.
1.1.Plugins Required #
Plugins Required
- Download Formidable Forms Builder
- An SSL Certificate.
- Square account.
- WordPress 5.0+
- PHP version 5.5+
- Square API is currently only available for the U.S., Canada, Australia, Japan, and the UK.
2.How to use Plugin #
2.1.Step 1: Connect with Square #
- Navigate to the Formidable -> Global settings page.
- Locate and click on the ‘Square’ option to access Square integration settings.
- Log in to your Square account and open the Square app on your device.
- In the Squaere app, go to the Credentials section. Copy the Application ID and Access Tokn.
- Navigate to the Locations menu in the Square app.
- Copy the Location ID.
-
- Return to the Formidable Global Settings Square page.
- Paste the Application ID, Access Token, and Location ID into the respective fields.
- Click on the Connect with Square button to establish a connection between Formidable Forms and Square.
- Click on the Save button.
2.2.Step 2: Create a New Form #
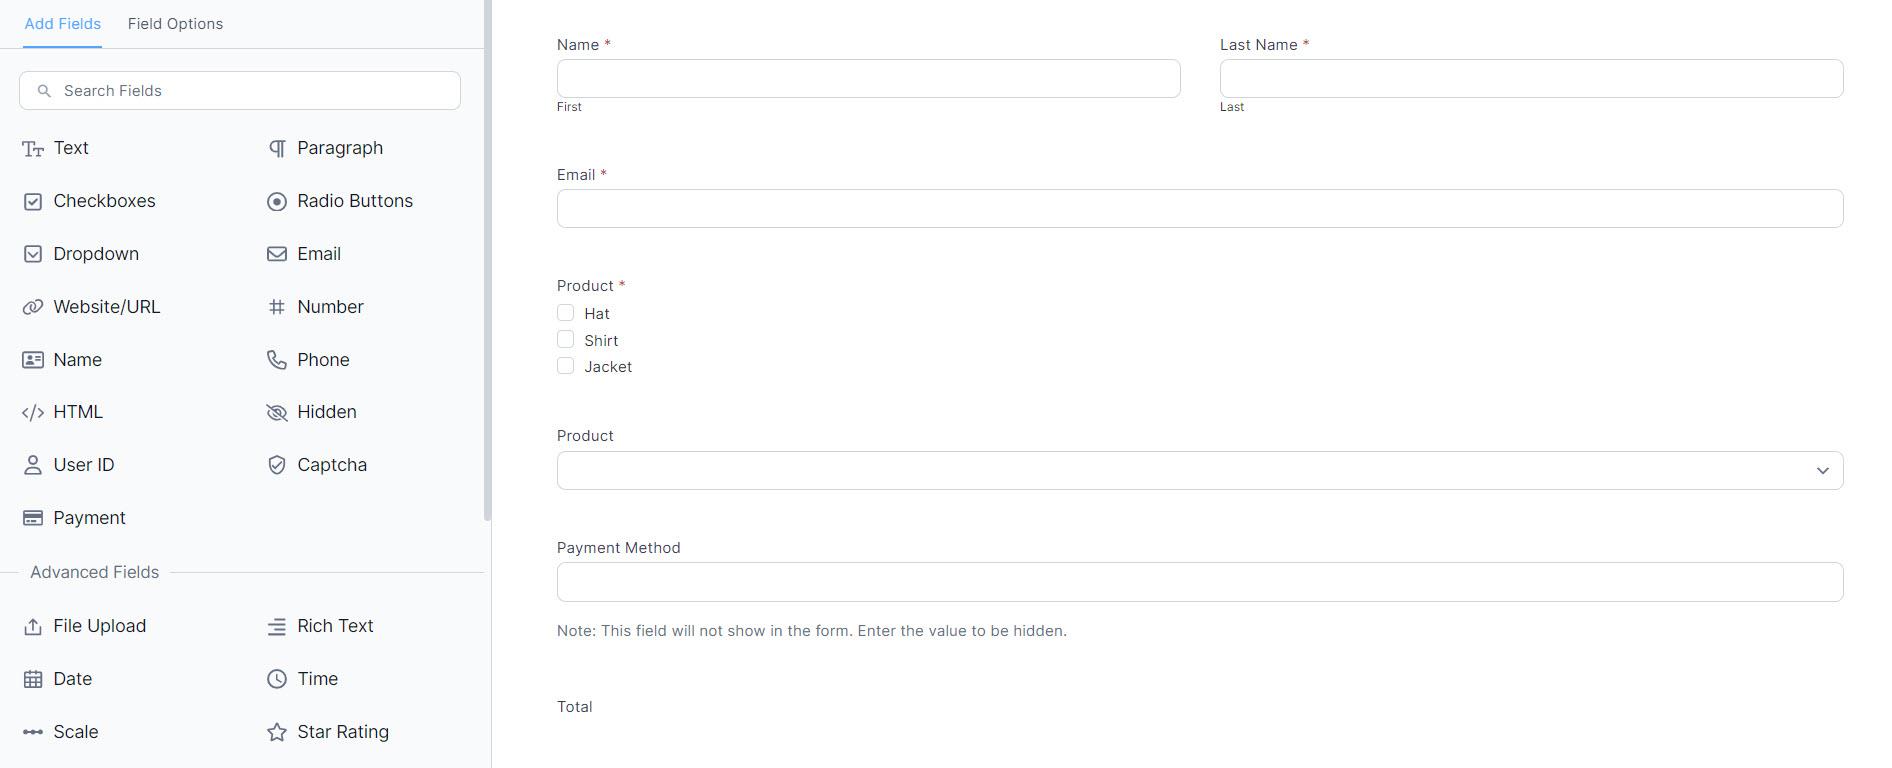
- Go to the Formidable -> Forms and create a new form.
- Add fields to the form, such as Name, Last Name, Email
- Navigate to the ‘Advanced Fields’ section
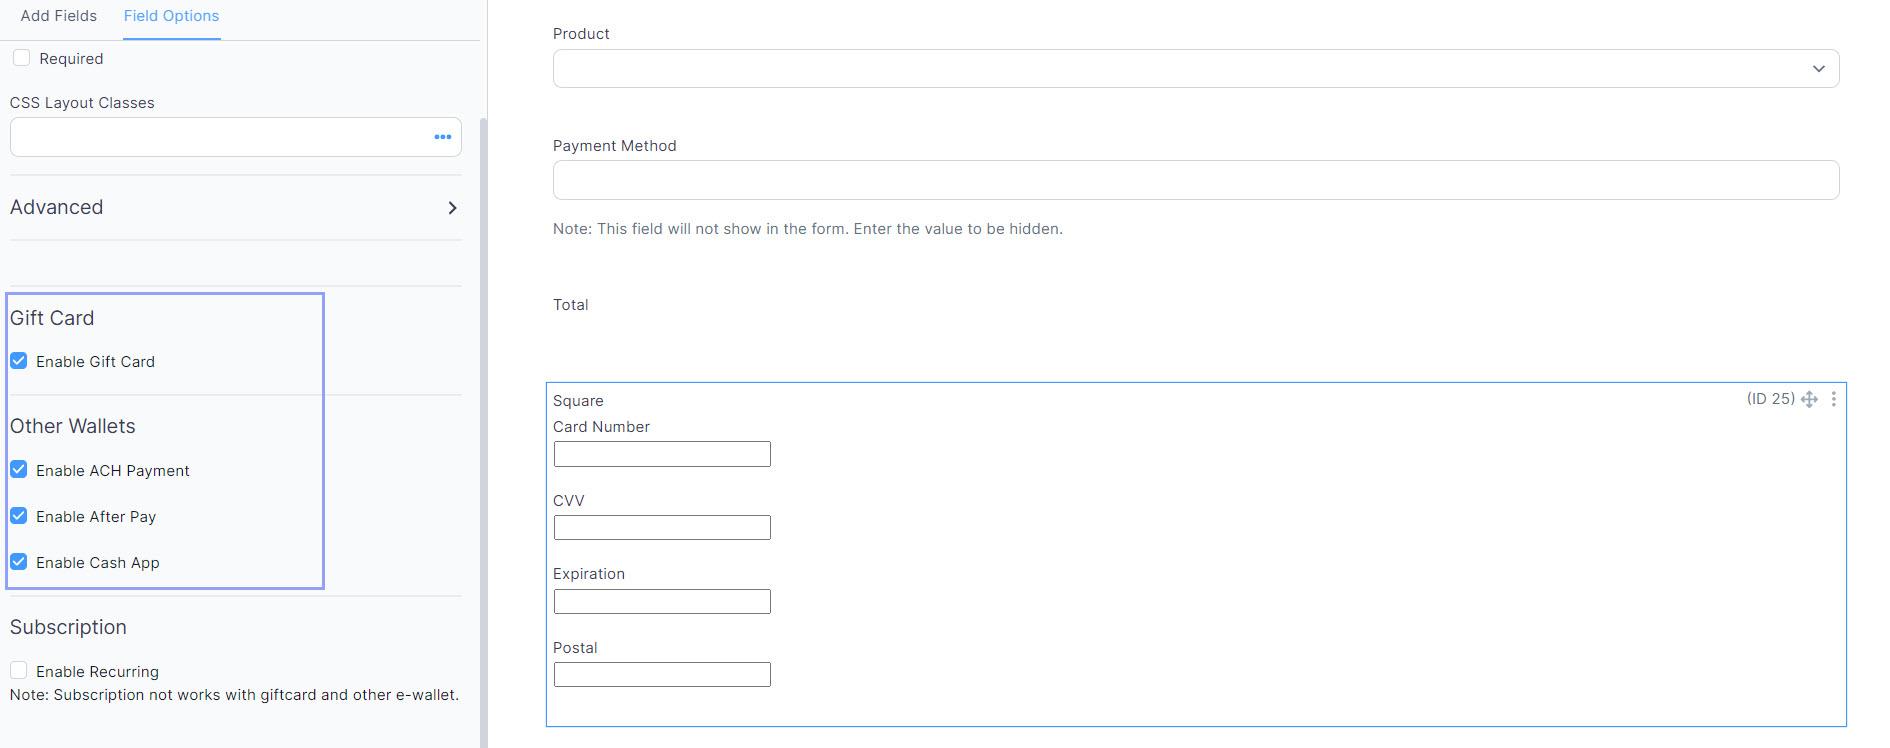
- Drag and drop the ‘Square’ field into your form from the ‘Advanced Fields’ section.
- In the field options, enable the desired payment options such as Gift Card, ACH Payment, Afterpay, and Cash App.
- Click the Save button to save the form with the Square integration settings.
-
- Navigate to the Settings tab -> Action & Notification.
- Click on Square in from the form action.
- Click on the Save button.
2.3.Step 3: Create a New Page #
- In your WordPress dashboard, navigate to Pages and click on Add New.
- Enter a title for the page, for example, Formidable Square.
- Add the Formidable Forms block.
3.Front-End Impact: #
3.1.ACH Payment #
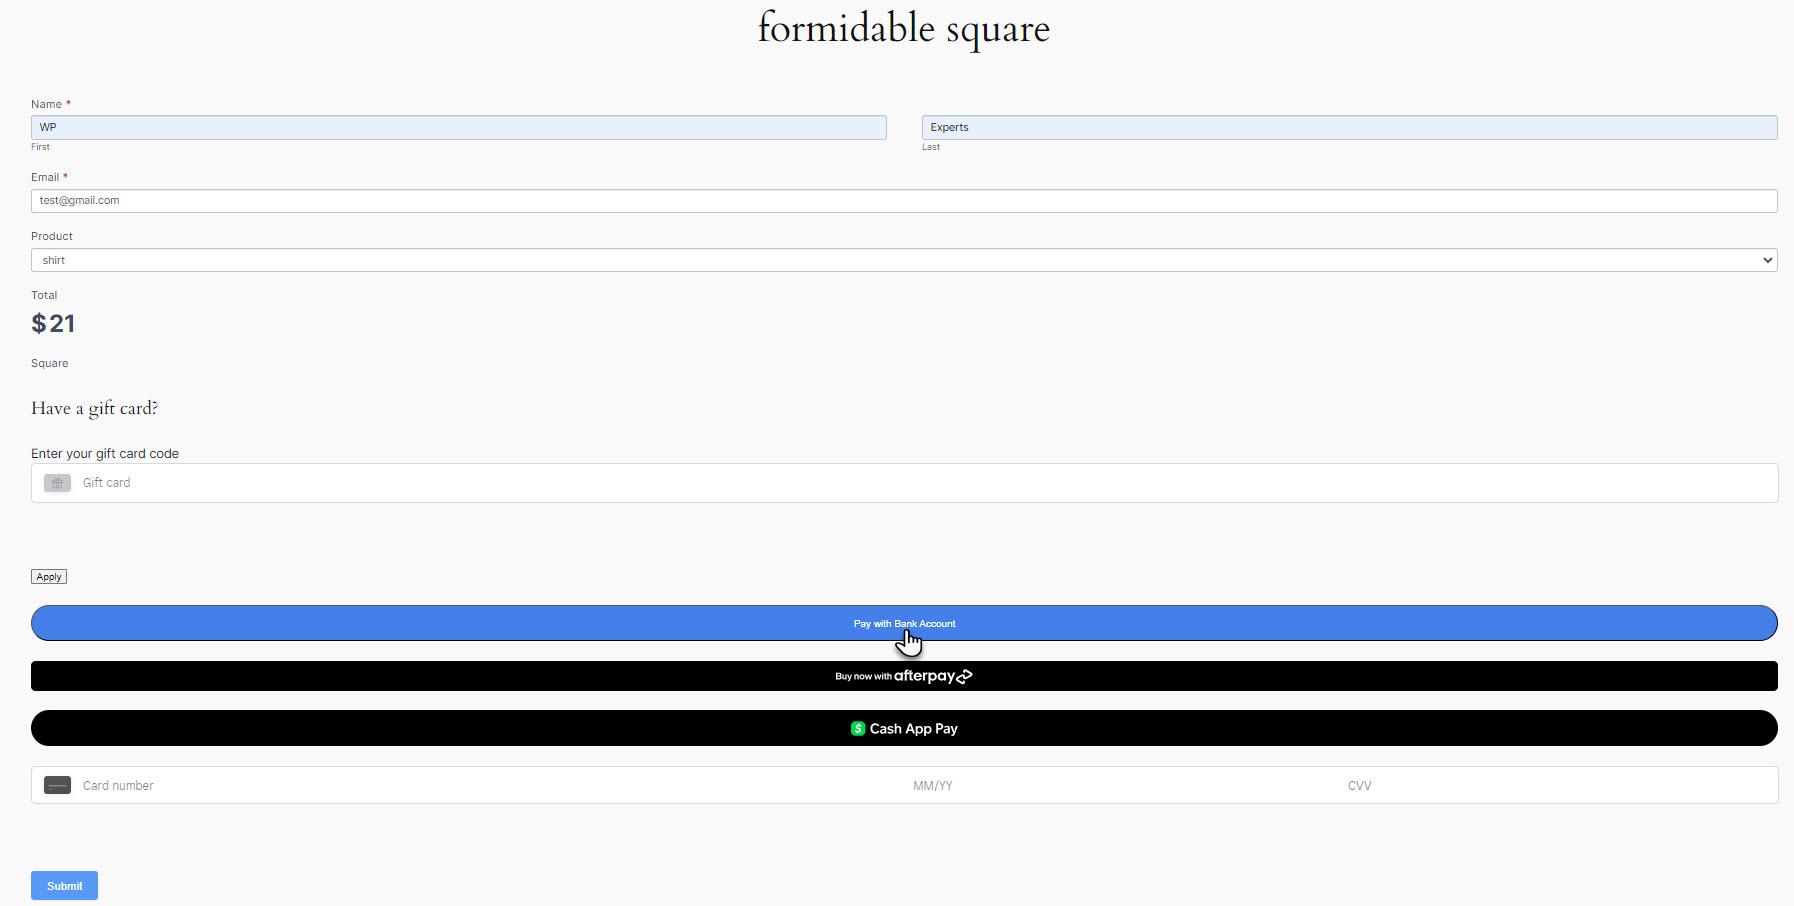
- Click the ACH pay (Pay with Bank Account) option.
- The user needs to click on it.
Step 1:
-
- Click the Pay with Bank Account button On the Formidable Square page, click on the Pay with Bank Account button to start the ACH transaction process.
- Select Your Bank: A list of available banks will be displayed. Choose your bank from the provided options.
- Login to Your Bank Account: You will be redirected to the login page of your bank’s online portal.
Step 2: Signing into the FPB Portal
-
- FPB Sign-in: Upon successful login to your bank account, you’ll be prompted to continue the transaction.
- FPB Portal Login: You will be directed to sign in to the FPB portal. Enter your FPB portal username and password as required.
Select Your Account: Once signed in, choose the bank account linked to the transaction.
Step 3: Linking Your Account and Completing the Transaction
- Link Your Account: After selecting your account, follow the prompts to link it to the transaction. This might involve confirming details or authorizing access.

- Continue with Transaction: Once your account is successfully linked, click on the Continue button to proceed with the transaction.
- Transaction Confirmation: The system will process the transaction, and upon completion, a message confirming the successful transaction will appear on the screen.
3.2.After Pay: #
- An option for payment Afterpay (Buy now with Afterpay) will appear.
- The user needs to click on it.
- Click the Buy Now with Afterpay button. A popup window will appear, prompting you to enter your Afterpay credentials. Input your Afterpay username and password in the provided fields.
- After entering your credentials, click on the “Continue” button to proceed with the payment process.
- Once you’ve successfully logged in, you’ll be presented with split payment options. These options typically involve dividing the total purchase amount into installments.
- After choosing your preferred payment option, click on the “Continue” button to proceed with the transaction.
-
- Upon successful processing, a message or notification confirming the successful payment will be displayed on the screen.
3.3.Cash App: #
- An option for payment with Cash App (Cash App Pay) will appear.
- The user needs to click on it.
- After selecting Cash App as your payment method, a popup window will appear displaying a QR code. This QR code contains payment information for your transaction.
- Open Cash App: Take your mobile phone and open the Cash App application.
- Scan to Pay: Within the Cash App, locate and tap the “Scan” or “Scan QR Code” option. This usually appears as an icon or within the payment section.
- Scan the QR Code: Use your phone’s camera to scan the QR code displayed on your computer or the payment screen. Align the QR code within the camera frame until it’s recognized.
- Transaction Details: Upon scanning the QR code, the Cash App will display transaction details on your phone screen, such as the recipient and payment amount.
- Confirm Payment: Verify the transaction details shown on your Cash App and then confirm the payment by tapping the appropriate option.
- Transaction Completion: After confirming the payment, Cash App will process the transaction, and you will receive a confirmation notification on your phone indicating that the payment has been completed.
3.4.Square Gift Card: #
- An option for payment with a Gift Card will appear.
- The user needs to click on it.
- Enter Gift Card Code: Carefully input the gift card code into the designated field. Ensure accuracy to avoid any errors in code entry.
- Apply Gift Card: After entering the gift card code, click on the “Apply Gift Card” button to proceed.
- Then click on the checkbox, and the system processes the gift card code. It will validate the code and apply the associated discount to your total payment.
Help Guide Powered by Documentor


