ny seasoned veteran will tell you that selling on WooCommerce isn’t as difficult as people think it is. What’s challenging is optimizing the conversion process to make your eCommerce easier and more profitable.
For this said purpose, we seek help from sales funnel plugins that use key pages and features to help visitors complete their purchase smoothly and without much distractions. This is where CartFlows comes in.
AN INTRODUCTION TO CARTFLOWS
Cartflows is the ultimate tool to implement complex ‘sales funnels’ into your WooCommerce powered website. With this plugin, you have complete control over the entire sales experience, from the initial landing page, all the way through to the combination of upsells, downsells, and bump offers.
Cartflows is currently available in both Free & Premium versions. Here is what CartFlows can bring to the table:
- Pre-built sales funnel pages for your online store
- Funnel optimization for both the pre- and post-sales stages
- Integration with WooCommerce and its official extensions
- Full customization options for each step of your sales funnels
- ‘Frictionless checkout’ to minimize distractions
- Cart abandonment targeting to regain lost leads
- Upselling and discounts incorporated into the checkout process
- Customization for the thank you page.
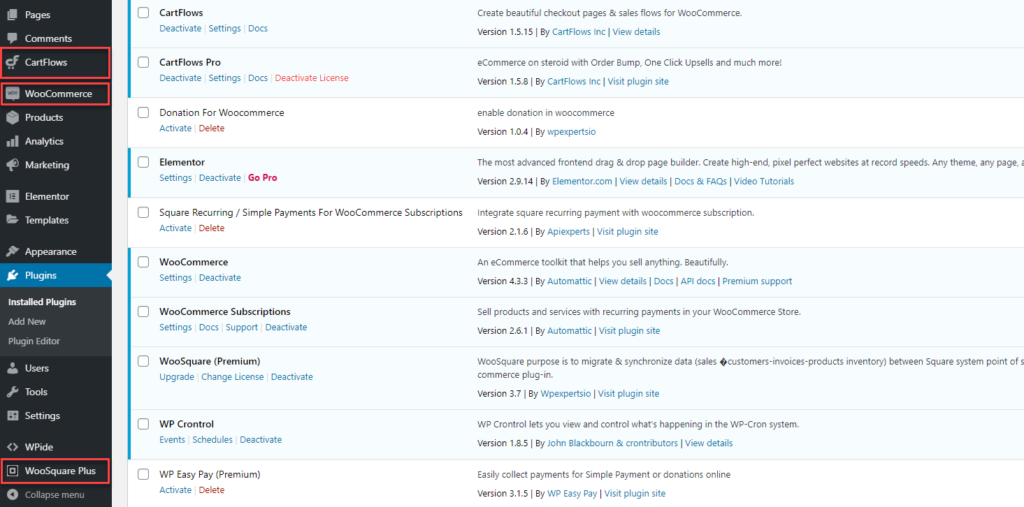
CartFlows integration with WooSquare and WooSquare Plus – an overview
WooSquare and WooSquare Plus’s latest integration with CartFlows gives WooCommerce store owners the benefit of creating conversion-optimized sales funnels. Following are the pages in the CartFlows where the Payment Gateways can be implemented:
1. Checkout page
2. Upsell/Downsell pages
After reading about CartFlows and WooSquare plus, let’s get into the details of how ‘CartFlows for WooSquare & WooSquare plus’ integration works and how we can configure its settings on a WordPress powered site.
With CartFlows Pro for WooSquare & WooSquare Plus, you can integrate WooSquare and WooSquare Plus payment gateway with the following CartFlow pages:
- Landing page
- Checkout page
- Upsell/down sell page
- Thank you page
STEP-BY-STEP GUIDE – HOW TO SET UP WOOSQUARE AND WOOSQUARE PLUS WITH CARTFLOWS PRO
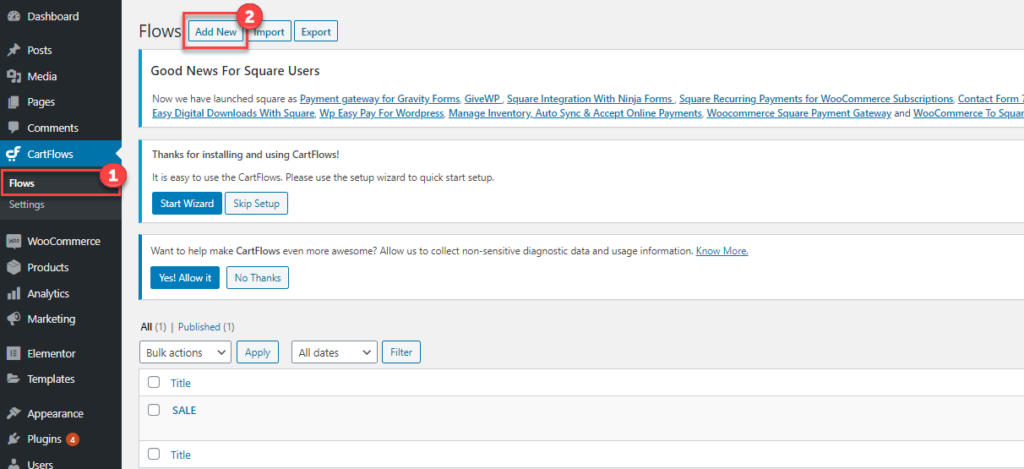
STEP #1: Go to the “CartFlows” tab. Click on “flows” and then the ‘add new’ option.
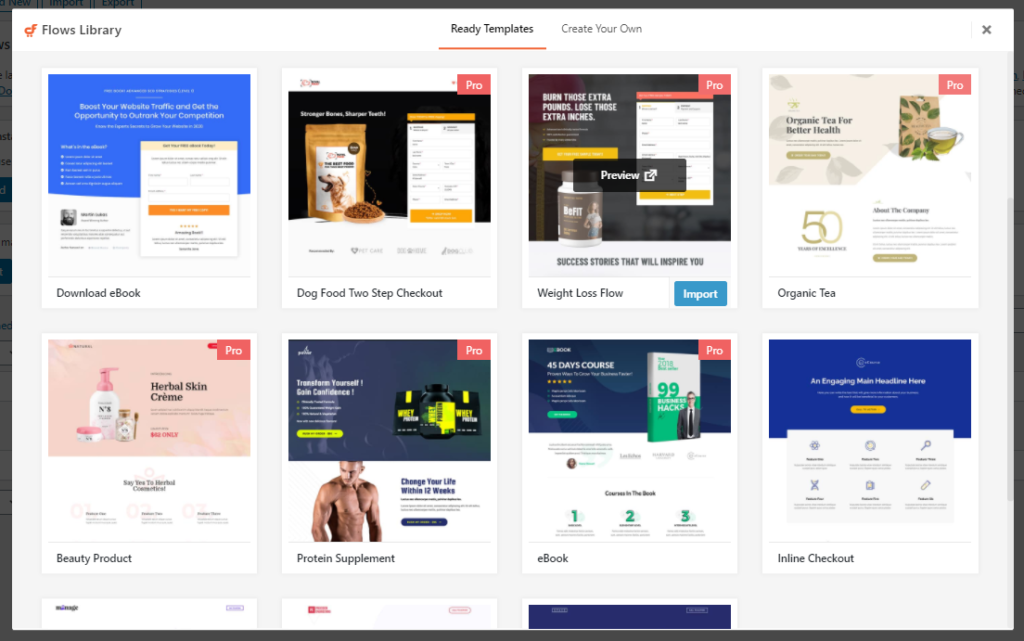
STEP #2: When you click on the “add new” option, it will lead you to flows library, where you can use ready-to-use templates or create your own.
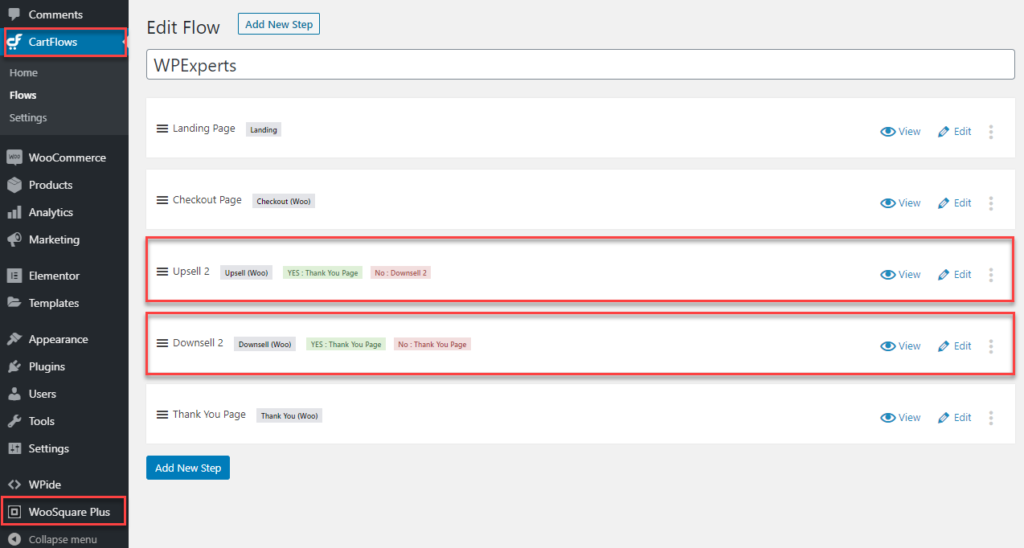
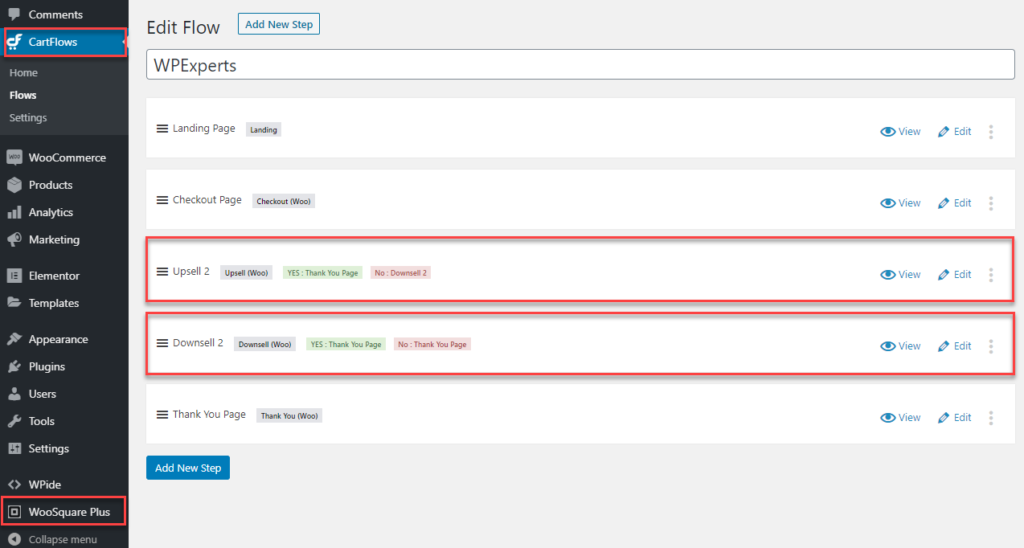
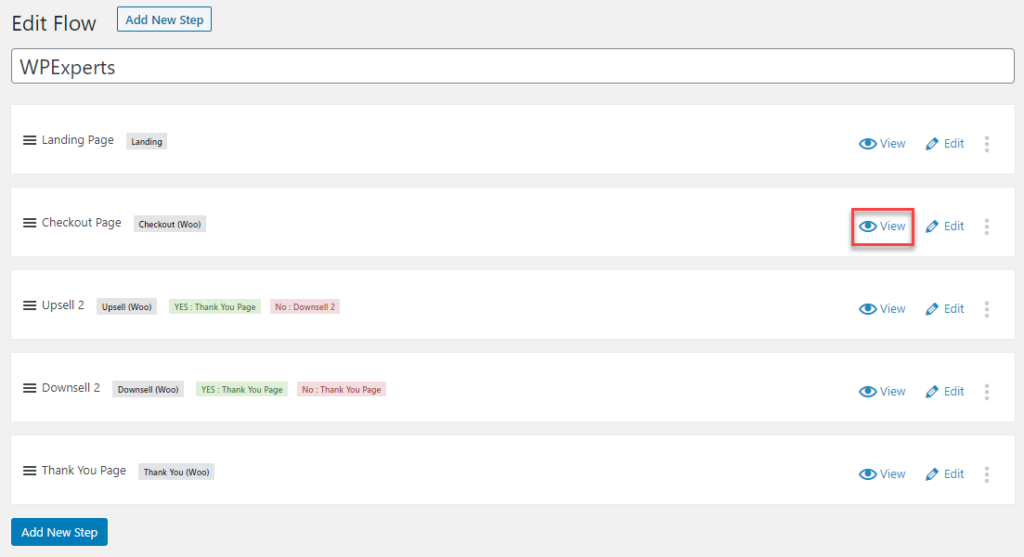
STEP #3: Now, you have to edit your flows, landing, checkout, upsell/down-sell, and thank you page settings.
Make sure upsell & down-sell flows are placed after the checkout page and before the thank you page.
In the cartflow premium version, you can create a custom ‘thank you’ page.
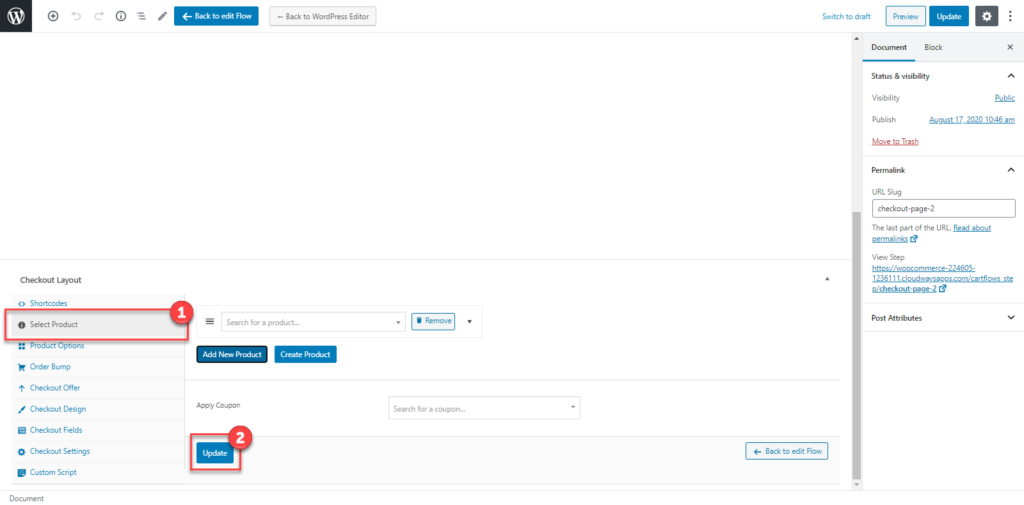
STEP #4: Click on the “edit” option next to the “checkout page” label.
This will lead you to the ‘Select Product’ option that will enable you to display the products of your choice on the checkout page.
In a dropdown menu, just type the first three letters of a product name (already available on your WooCommerce store), and it will show you the full name of the product. Make sure you click on the “Update” button after choosing your product.
STEP #5: Now, we will configure the ‘Upsell/down sell page’ settings.
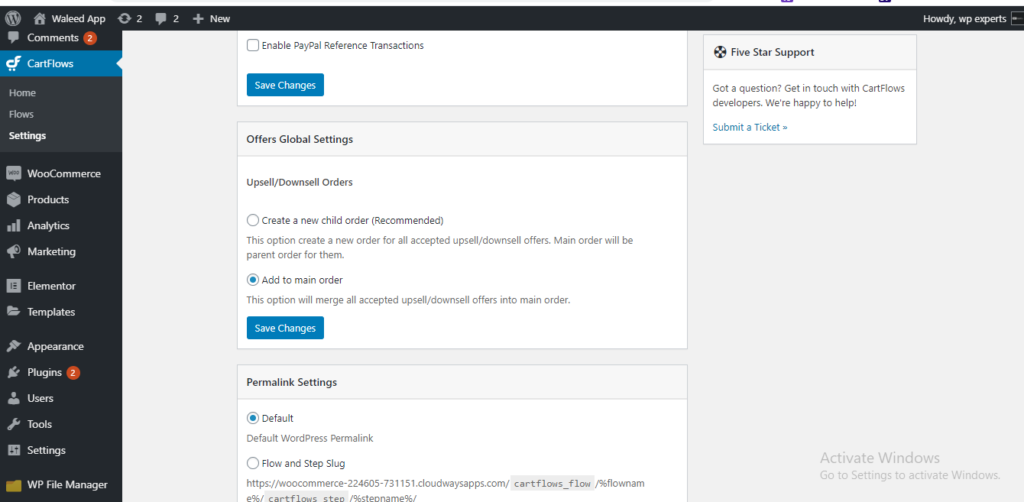
STEP #6: Upsell/Downsell Orders.
Inside the settings, you will find the following options:
(i) Create a new child order
This option creates a new order for all accepted upsell/downsell offers. The main order will be a parent order for them.
(ii) Add to the main order
This option will merge all accepted upsell/downsell offers into the main order.
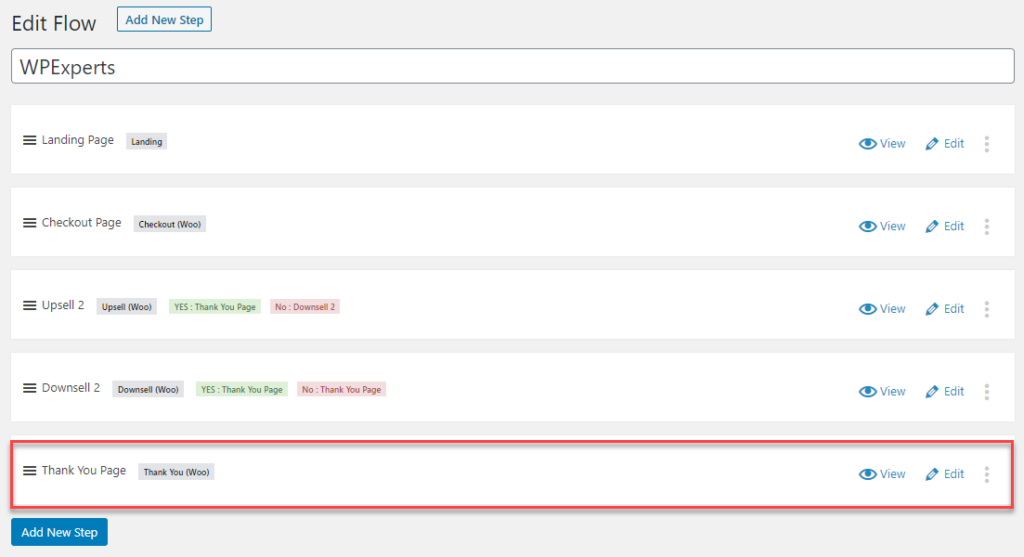
STEP #7: Next, select or create the ‘thank you’ page that the customers will see once they are done with their order placement.
You can view your flows from the back-end settings using the “view” button.
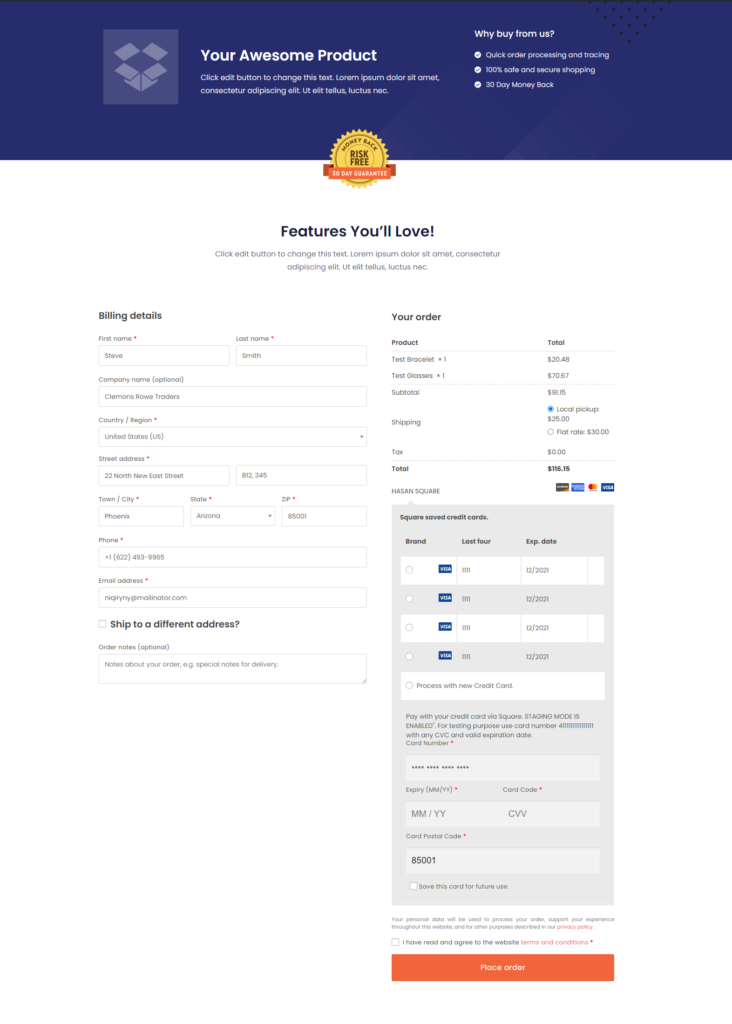
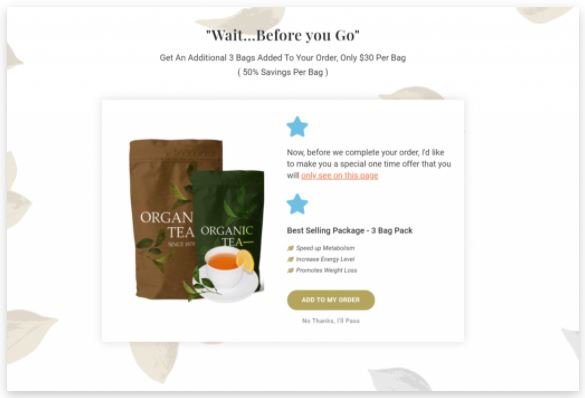
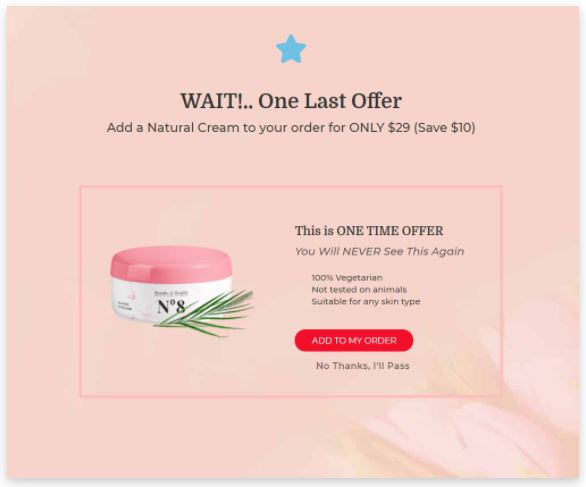
FRONT-END SCREENSHOTS OF FLOWS PAGES.
1- Landing Page
2- Checkout Page
3- Upsell Popup
4- Downsell Popup
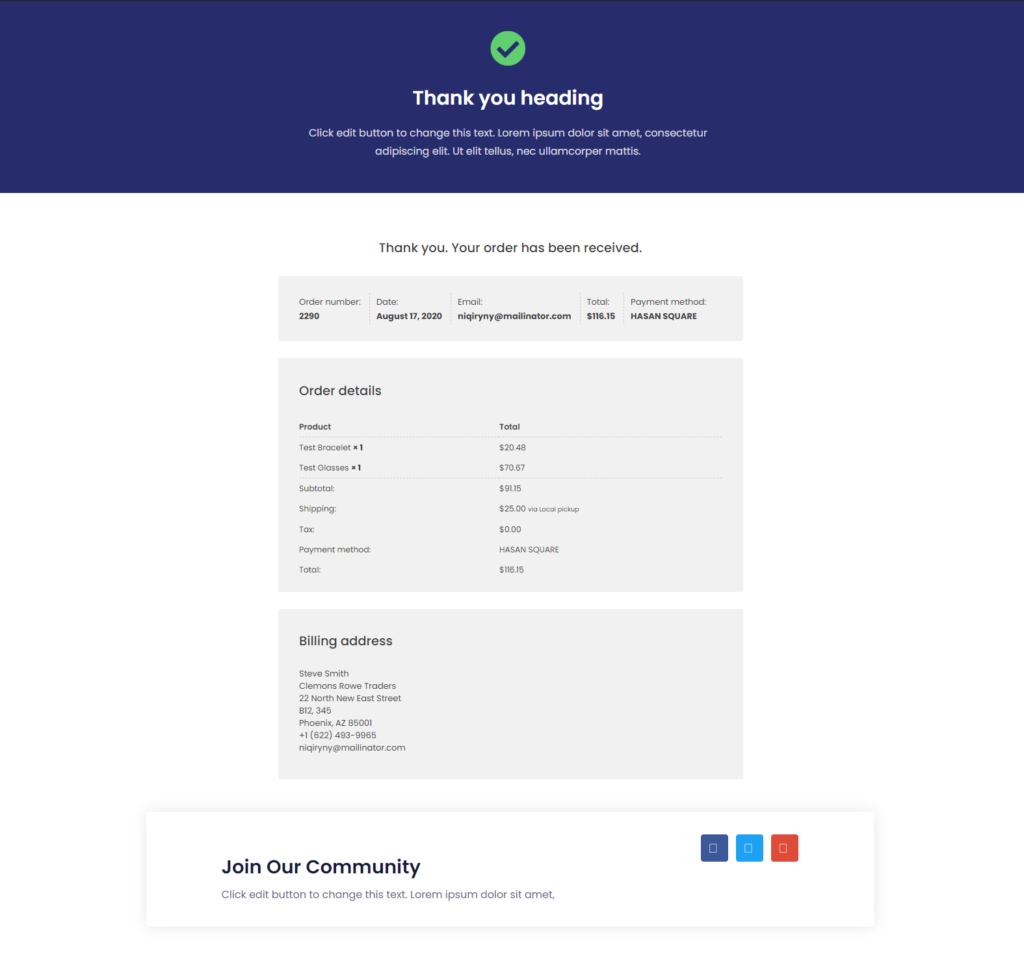
5- Thank You Page
That’s it!! You’re done with ‘Cartflows For WooSquare Plus’ settings for your WooCommerce’s powered website.
Do you have any questions about how to use CartFlows? Feel free to email us at woosquare.plus@apiexperts.io
