

Do you want to increase your sales by integrating Square POS and WooCommerce? If your answer is yes, we have got the right solution for you!
According to the US Census Bureau, “In 2023, e-commerce sales hit $1,118.7 billion, up 7.6% from the previous year. This represents 15.4% of total e-commerce sales.”
To capitalize on this growing trend and expand your customer base, your company must bridge the gap between online and offline sales.
By integrating Square POS with WooCommerce, you can enable secure credit card payments on your website and offline channels and ensure your inventory is always accurate and up-to-date.
Today, we will show you how to set up Square POS and WooCommerce in three simple steps using the WC Shop Sync plugin (also known as Square WooCommerce plugin).
Ready? Let’s get started!
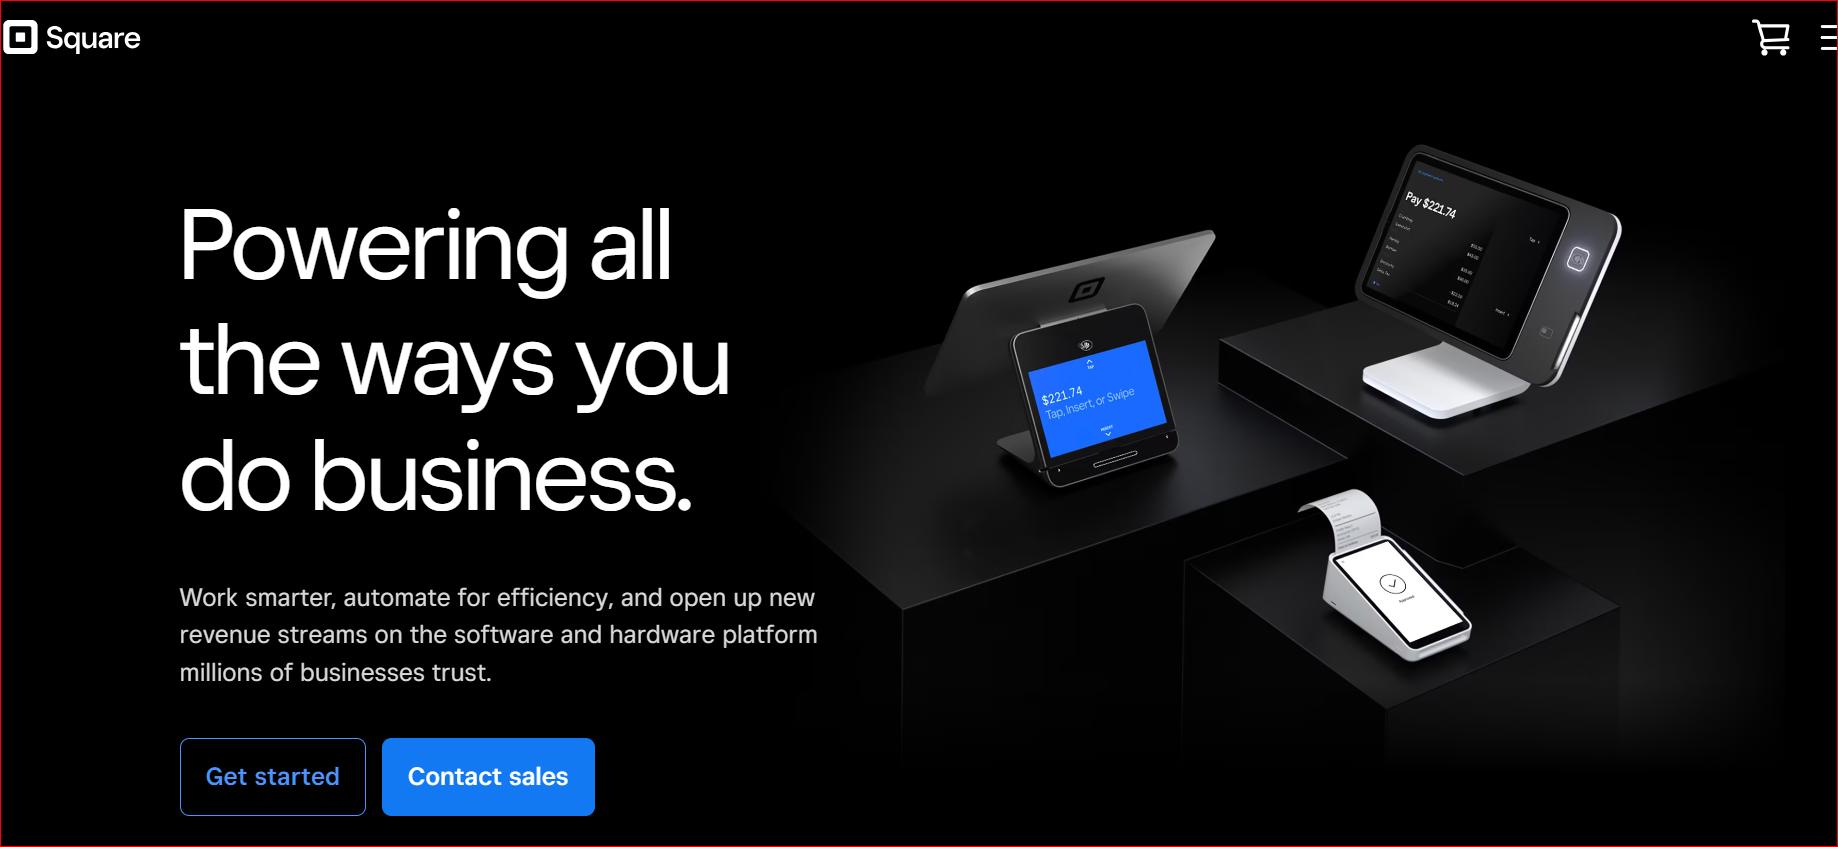
What is Square POS?
Square is a versatile cloud-based Point of Sale (POS) system designed for online and in-person sales. It offers seamless synchronization with major eCommerce platforms, such as WooCommerce, Magento, BigCommerce, and Wix.
With Square, you can accept payments on your WooCommerce store, giving you an alternative to traditional options like Stripe, Paypal, and WooCommerce.
What makes Square popular among small businesses is its adaptability – it allows you to transform your mobile device into a POS with its app or opt for additional hardware like registers and card readers.
Why Should You Connect Square POS with WooCommerce?
Integrating Square POS with WooCommerce opens up a whole new world of possibilities for your business. Some key benefits of Square integration with WooCommerce are as follows:
-
Auto-Inventory Synchronization
No more manual adjustments! With WooCommerce and Square integration, your inventory updates automatically across all channels. Add or edit products in WooCommerce, and an auto-sync process will replicate product data, including price and names, to your Square POS system.
-
Industry-Standard Security
You can rest assured with Square’s PCI-compliant payment solutions, which feature end-to-end encryption and built-in fraud detection. Moreover, you can customize security settings with 2-step verification, employee permissions, and account change notifications.
-
Free Software and Affordable Transaction Fees
The Square extension for WooCommerce is free, with cost-effective transaction fees. In the US, users pay 2.75% per in-person transaction and 2.9% + $0.30 for online transactions. The best part is that Square deposits funds within one to two business days, providing quick access to their money.
-
Supports All Major Payment Methods
Square POS simplifies your finances by supporting all major debit/credit cards and digital wallets, such as Google Pay and Apple Pay. This versatility ensures a smooth checkout experience for your customers.
-
Comprehensive Reporting and analytics
Upon setting up the Square POS system, you gain access to an analytics dashboard offering real-time sales data. You can also easily monitor sales trends, customer behavior, and create reports for strategic insights.
-
Seamless Integration with WooCommerce
Square fully supports WooCommerce integration, which you can easily configure using the WC Shop Sync plugin. Along with the Square POS setup the plugin offers tons of other amazing features, such as auto-product syncing, order and customer synchronization, multiple square payments options, and much more.
3 Easy Steps to Configure Square POS and WooCommerce
To learn how to set up the Square POS system with WooCommerce, check out the step-by-step guide below.
PLEASE NOTE! Before you set up Square for WooCommerce, note that the Square Point of Sale is available for free on the Apple App Store and Google Play in many countries. However, the Square app supports card payments only in the United States, Canada, Australia, Japan, the United Kingdom, the Republic of Ireland, France, and Spain.
Prerequisites for WooCommerce Square integration
Before setting up the Square POS system with WooCommerce, make sure that you meet the following requirements:
General Requirements:
- WooCommerce Installed and Configured
- Square Account – If you don’t have one, we’ll show you how to sign up for Square Account later in the guide.
Server Requirements:
- RAM: 2 or 4GB
- Processor: At least 2 Cores
- Storage: 40GB
- Bandwidth: 2TB
- Active SSL Certified
Once you have completed the above requirements, you can follow the three simple steps below to configure Square POS with your WooCommerce store.
Step #1: Sign Up for the Square Account
To configure Square POS with WooCommerce, first, you need to register for a Square account; here’s how to get started:
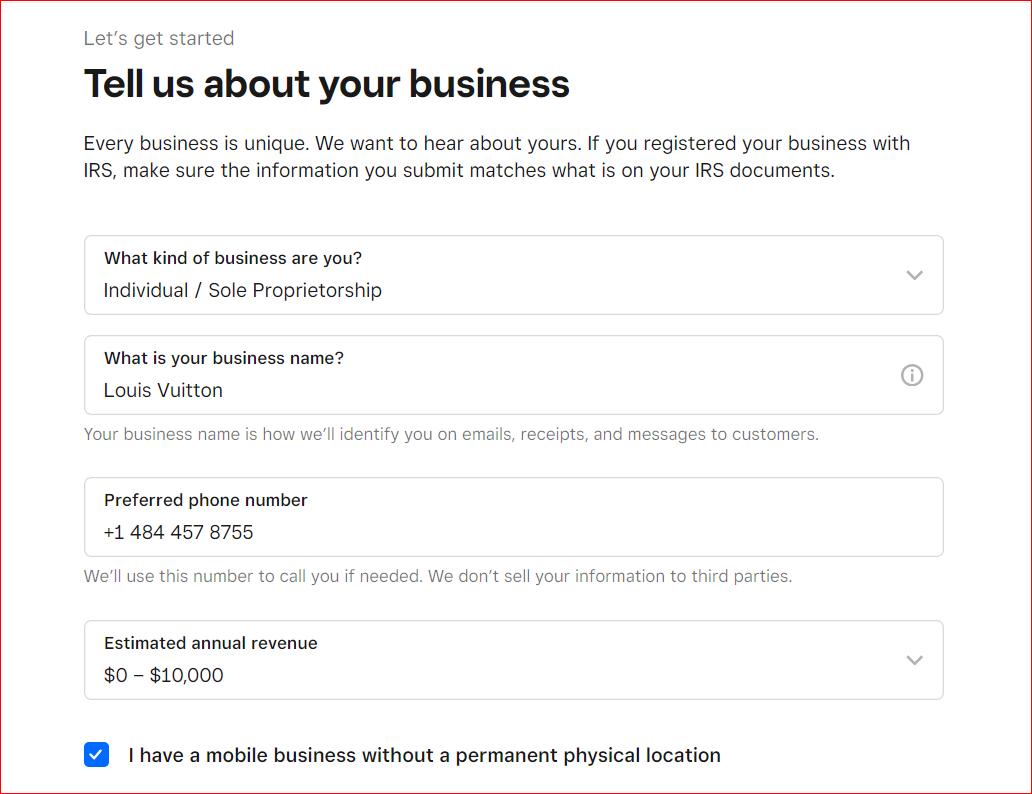
1. Visit the Square Website: Go to the Square official website and locate the option to sign up for a new account.
2. Provide Your Information: Fill out the required information, including your business details, contact information, estimated revenue, etc.
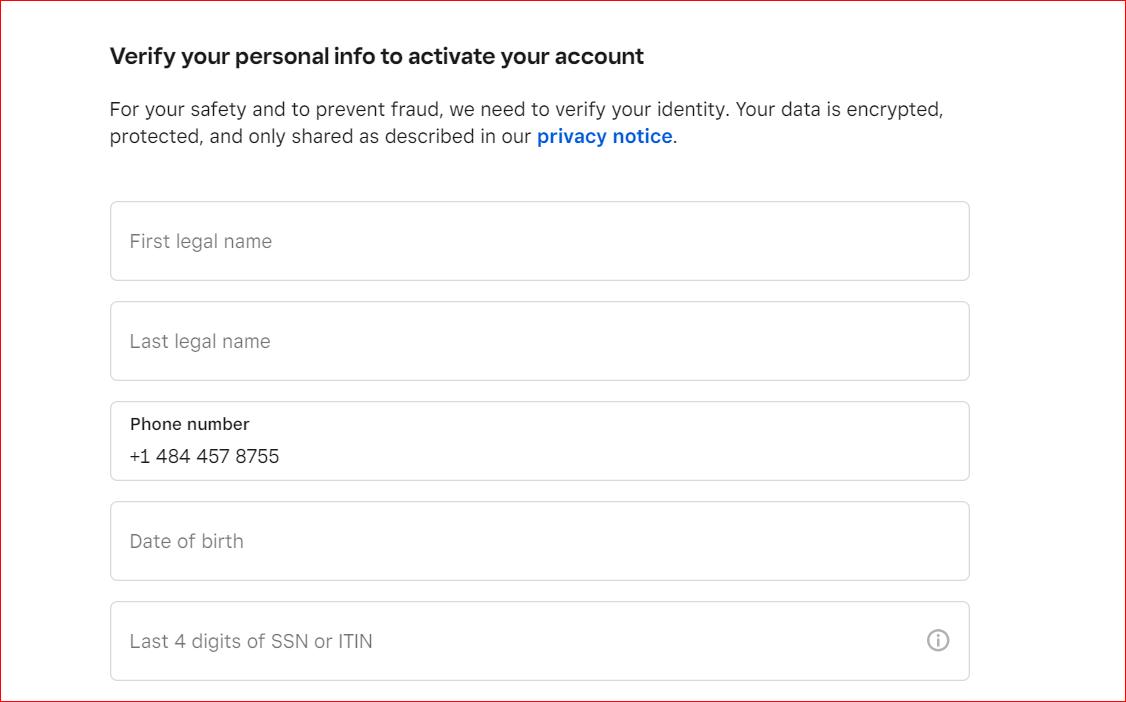
3. Verify Your Personal Information: Square will verify your personal information to keep you safe and avoid fraud.
4. Access Your Square Seller Dashboard: Once your account is verified, log in to your Square Seller dashboard.
Step #2: Install and Configure WC Shop Sync Plugin
To fully utilize all the features of the WC Shop Sync plugin, you need to have the premium version, which you can get by clicking here.
After getting the premium version of the WC Shop Sync plugin, follow the steps below.
A) Install and Activate the WC Shop Sync Plugin
1. Log in to your WordPress admin panel.
2. Navigate to the Plugins tab and click Add New plugin.
3. Upload the “woosquare-plus.zip” file.
4. Click Install Now, then Activate Plugin by entering the license key you received in the welcome email.
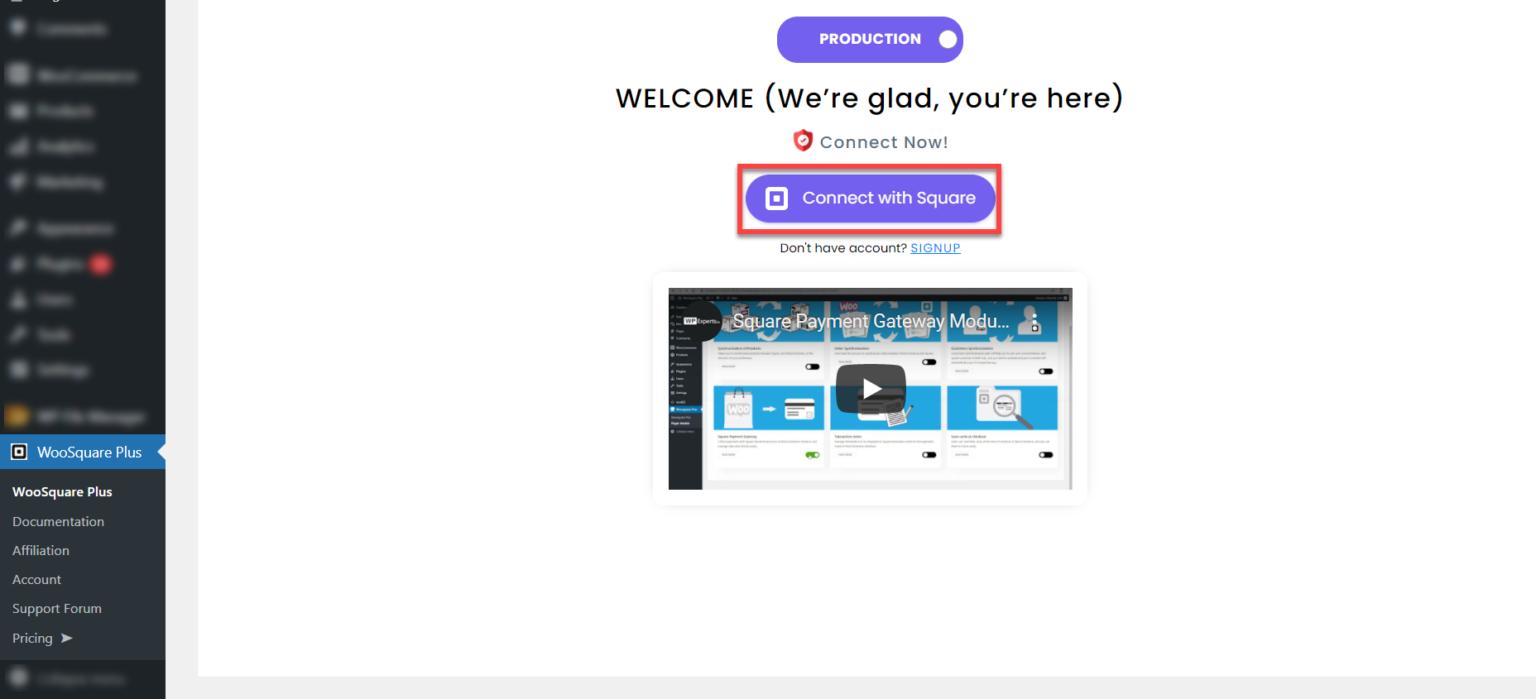
Upon activation, you’ll see the below screen:
B) Connect Your Square Seller Account
5. Click on the “Connect with Square” button.
6. You’ll be redirected to the Square login page if you’re not logged in to your Square account.
7. Enter your Square account credentials and sign in.
8. If you are not logged in to your Square account, you will be redirected to the Square login page.
9. Once logged in, allow authorized permissions for the plugin to retrieve data from Square.

10. Finally, select “THAT’S MY SITE – REDIRECT ME” button to return to your website.
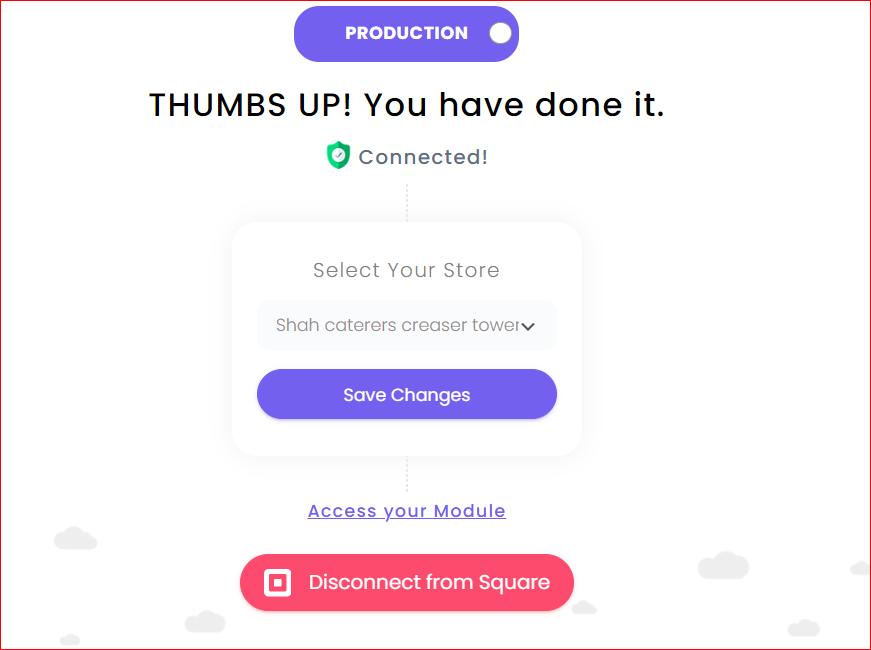
Step #3: Configure Woocommerce Square Setup
After successfully connecting your Square POS with your WooCommerce store, click on “Access Your Module” (as shown in the screenshot below) to configure further settings, such as product, order, customer, synchronization, payment setup, etc.
#1: Synchronize Your Products, Orders, and Customers
To configure each module, simply activate it using the toggle button from the WC Shop Sync settings.

After activating the module, go to the particular module from the left-hand side menu and configure it accordingly.
A) Product Synchronization
- Enable auto-sync by selecting “On” the radio button and selecting frequency from the drop-down menu.
- Select your preferred merging option.
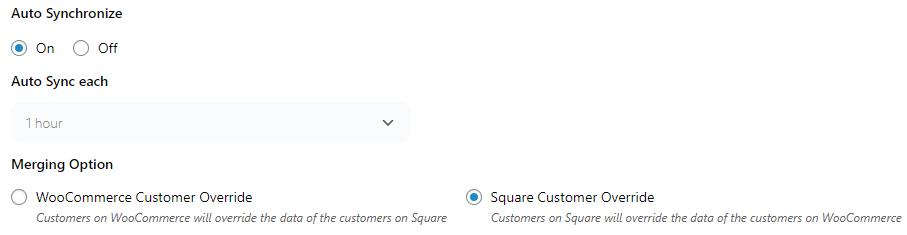
- Save changes to sync your products from Square POS to WooCommerce or vice versa.
B) Order Synchronization
- Checkmark the Yes under “Enable Square to WooCommerce Order synchronization.”
- Enter Application ID, Access Token, and Location ID.
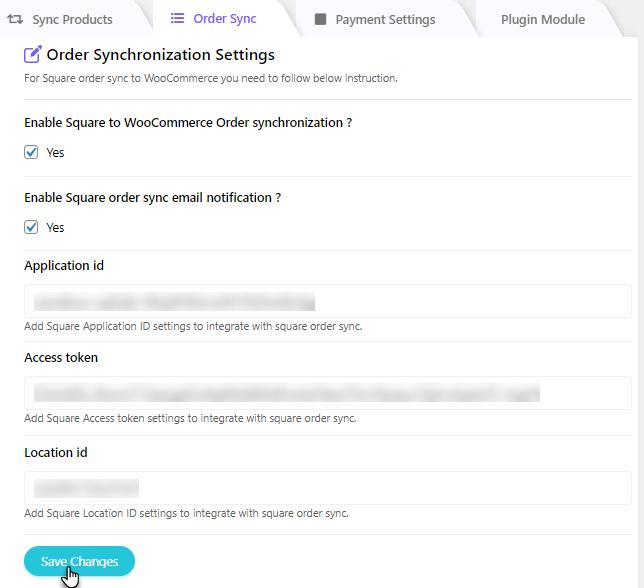
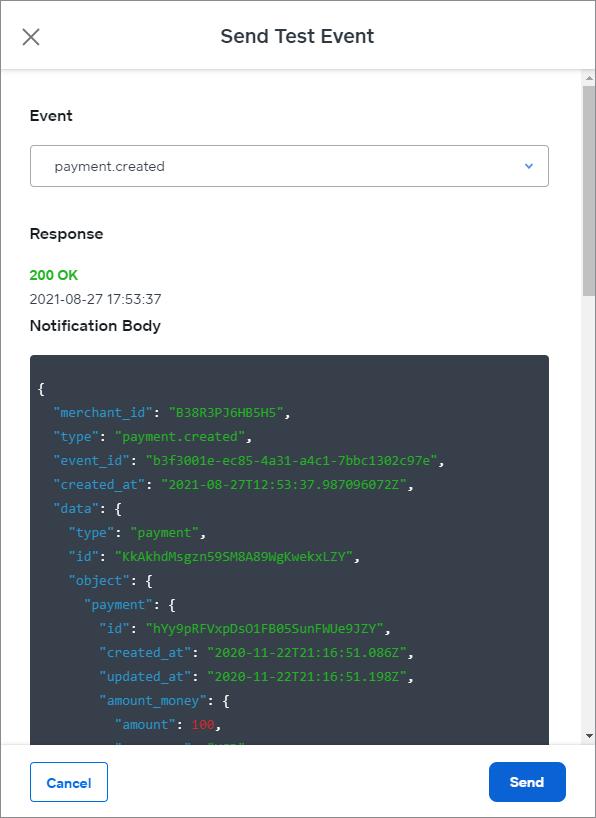
- Now, Set up Webhooks (enter this URL “https://wordpress-1082566-3798102.cloudwaysapps.com/wc-api/square_order_sync/”) in your Square account for payment and refund events.
Upon successful order synchronization, WC Shop Sync should return 200, which indicates Square settings are working correctly.
C) Customer Synchronization
- Enable customer synchronization by selecting “On” the radio button.
- Choose the sync override option between WooCommerce and Square.
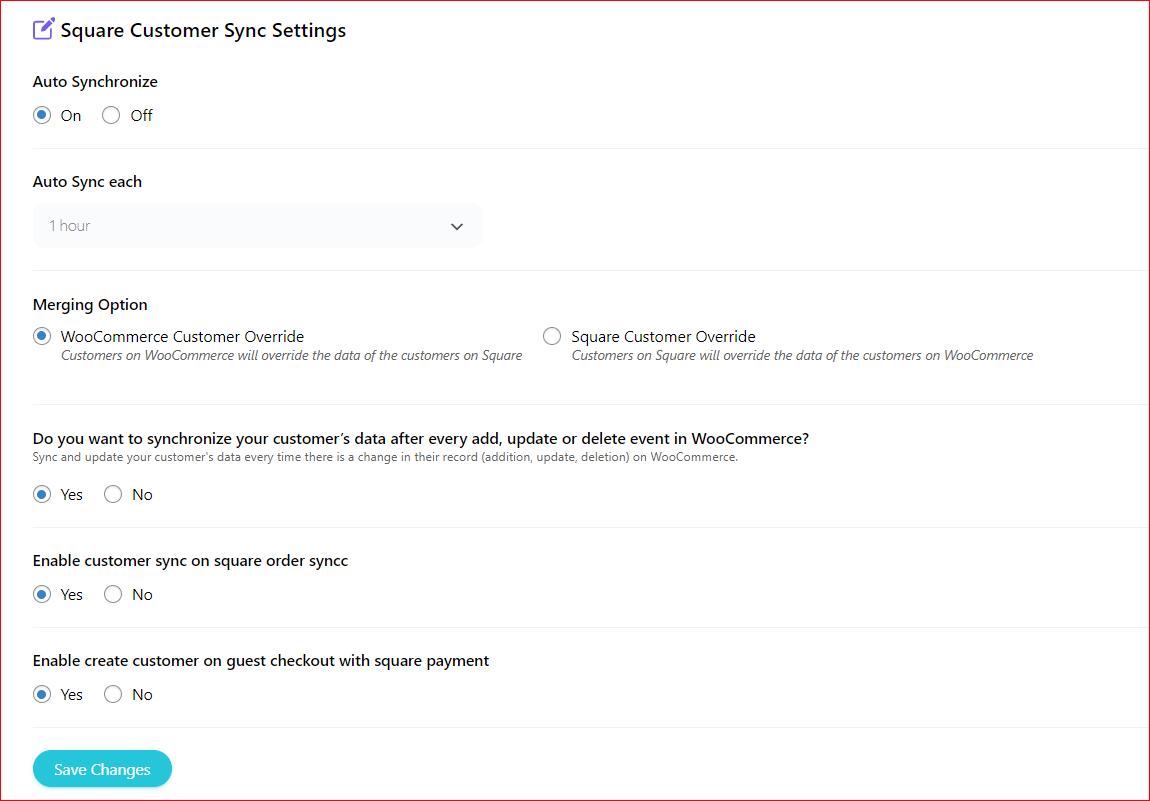
- Turn on the rest of the options if you wish.
- Finally, save changes to enable automatic customer synchronization.
#2: Set Up Square Payments
If you are wondering how do I set up Square payments in WooCommerce? Then, follow the steps below.
- Enable Square Payment Gateway: In your WooCommerce admin panel, go to WC Shop Syn → Access Your Module, then toggle on for the Square Payment Gateway module.
- Customize Payment Settings: Checkmark the “Enable Square ” box and then specify the title and description.
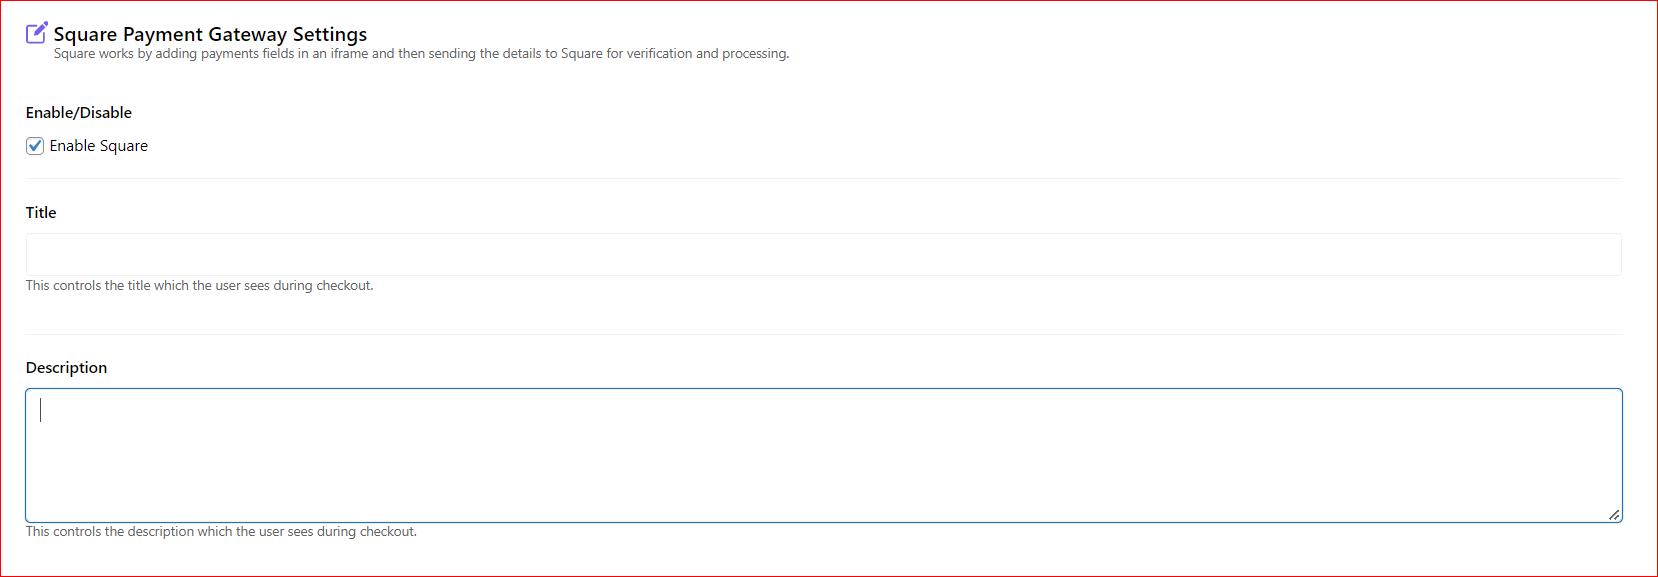
- If desired, enable additional payment options like Google Pay, Apple Pay, and ACH Payment.
To integrate Cash App Payments for your WooCommerce store, check out our detailed guide on how to accept Cash App Payments with WordPress and WooCommerce.

- Also, configure further payment miscellaneous settings such as:
- “Delay Capture” setting to authorize funds at purchase and capture when items ship.
- “Create Customer” creates Square customer profiles for order history.
- “Log Debug Messages” records system status logs.
- “Send Customer Info” sends first and last names with orders.
- “Enable/Disable Payment Reporting” shows detailed order info and item sales in Square Reports.
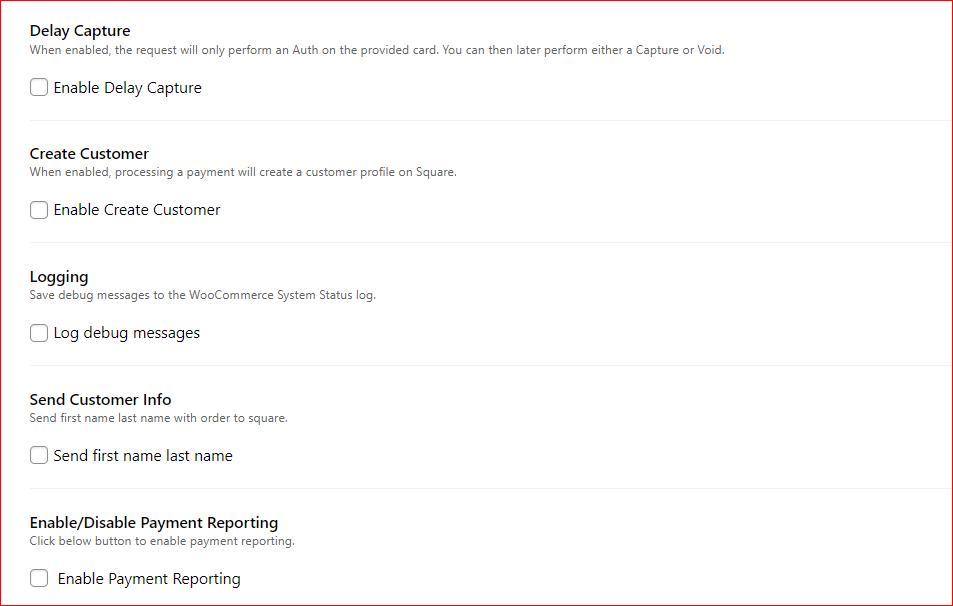
- Save Changes: Don’t forget to save your changes to activate Square Payment Gateway on the WooCommerce checkout page.
Now, Check Out the Front End of Your WooCommerce Store
After you’ve set up everything, visit your WooCommerce store and explore the checkout process.
Test Square Payment Gateway, Google Pay, Apple Pay, and other payment options. Also, make sure orders are synchronized seamlessly between Square and WooCommerce.
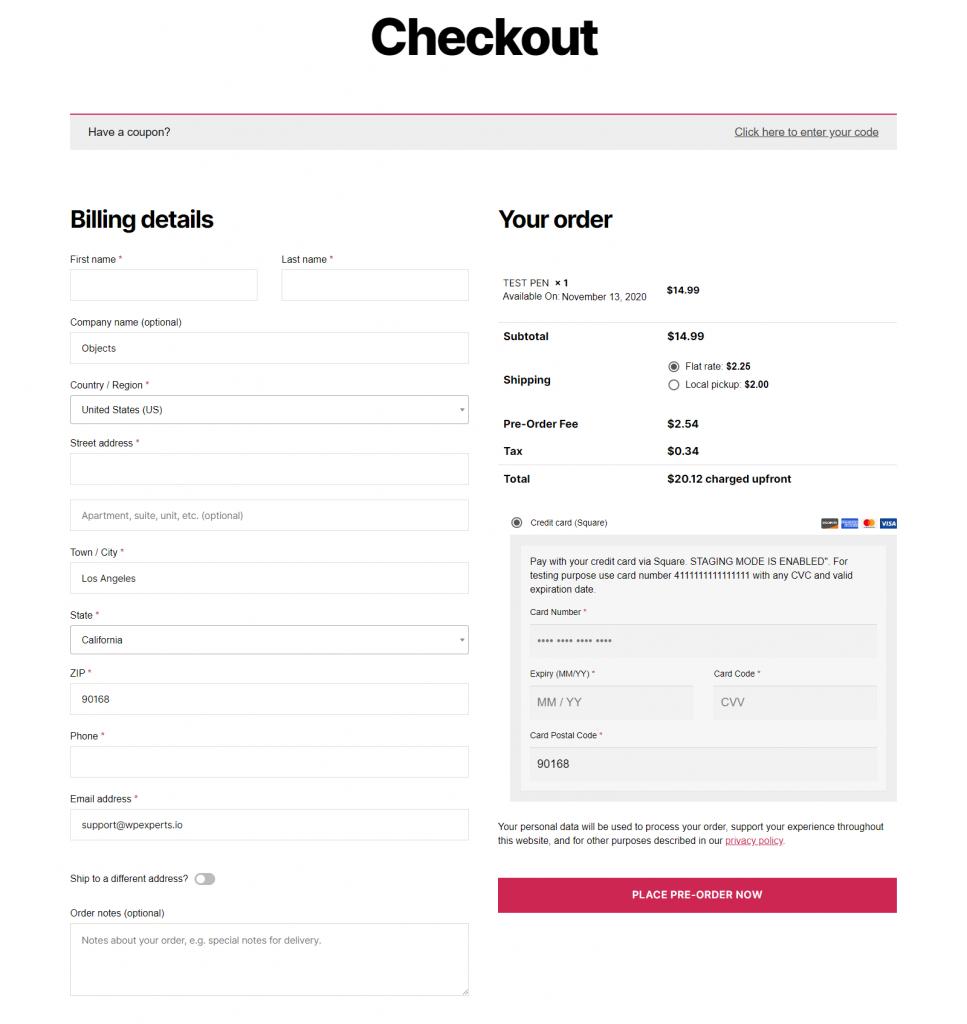
NOTE: If you are using an Apple device, you will only see the Apple Pay button.
To set up Square Terminal for Woocommerce, check out our detailed guide on how to configure Square Terminal for Woocommerce via WC Shop Sync.
The Bottom Line
To set up Square POS and WooCommerce using the WC Shop Sync plugin offers numerous benefits for eCommerce businesses. From automatic inventory syncing to versatile payment options and detailed analytics, this square integration with WooCommerce streamlines operations and enhances customer experience.
By following these easy steps, you can integrate Square POS with WooCommerce, allowing you to manage products, orders, and payments.
Lastly, if you need any help with WooCommerce Square POS integration, feel free to contact us via our support channel. Our team of WordPress experts is always ready to help you with all Woocommerce issues.
Frequently Asked Questions
- Does Square support two-way product syncing?
Yes, Square supports two-way product syncing for seamless inventory management. For WooCommerce and Square POS, you need to install the WC Shop Sync plugin.
- How do I add Square POS to my website?
Simply install the WC Shop Sync plugin to add Square POS to your WooCommerce website.
- Is Square compatible with WooCommerce?
Square is fully compatible with WooCommerce, all you need is to install the WC Shop Sync plugin, connect your square account with your bestie and you are good to go.
- How do I set up Square payments in WooCommerce?
To set up Square payments in WooCommerce, you must install the WC Shop Sync plugin, enable the Square Payment Gateway module, and then configure the payment gateway of your choice (e.g., Google Pay, Apple Pay, ACH Payments, Cash App, etc.).
- Does Square POS work with WooCommerce?
Yes, Square POS works seamlessly with WooCommerce for enhanced sales management.
- What is Square in WooCommerce?
Square in WooCommerce refers to integrating the Square POS system with WooCommerce to streamline sales and inventory management.


