

You probably want to set up Apple Pay in WooCommerce, right? Well, you are on the right page!
As more and more people are hesitant to use their bank accounts and credit cards online, Apple Pay is becoming an increasingly popular payment method.
‘In fact, over 90% of U.S. retailers now accept Apple Pay. In 2023 alone, Apple Pay processed 12.6% of all online consumer payments and 3.1% of in-store purchases.’
Unfortunately, Apple Pay doesn’t provide a plugin for WooCommerce, but there are certain payment gateways, such as Square Payment Gateway, that allow you to integrate Apple Pay on your WooCommerce checkout page.
Today, we will show you how to set up Apple Pay in WooCommerce using the WC Shop Sync plugin in just three easy steps.
Ready? Let’s get started!
What is Apple Pay?
Apple Pay is a mobile payment and digital wallet service by Apple Inc. It allows users to make payments in person, in iOS apps, and on the web using Safari. It uses Near Field Communication (NFC) technology for contactless payments.
According to recent estimates, Apple Pay has over 640 million users across 83 countries around the globe.
Using Apple Pay is similar to using a credit card, but instead of carrying a physical card, it stores payment info on a device, typically a smartphone. Users can link their debit and credit cards to the Wallet app on their iPhones. This setup allows Apple Pay users to make quick and convenient payments both online and in physical stores.
The best thing about Apple Pay is that it simplifies the checkout process. Users can complete transactions with a simple touch or even using Face ID, Touch ID, or a passcode.
Such convenience, coupled with robust security, makes Apple Pay an attractive payment option for both consumers and merchants.
Why Should You Use Apple Pay in WooCommerce?
As we told you earlier, Apple Pay makes online payment simple by storing card details on a user’s device (especially a mobile phone).
That’s why using Apple Pay in your WooCommerce store can significantly enhance the shopping experience for your customers. It offers a blend of speed, security, and convenience that sets your business apart in a competitive market.
Here are a few reasons why you should integer Apple Pay on your WooCommerce store:
- Faster Checkout: Apple Pay allows customers to complete transactions with just a tap or a glance, drastically reducing the time spent at checkout and improving overall efficiency.
- Better Conversion Rates: Simplifying the payment process helps reduce cart abandonment rates. Customers are more likely to complete their purchases when the checkout process is quick and straightforward.
- Widespread Acceptance: Millions of retailers worldwide accept Apple Pay. By offering this payment method, you are appealing to a large user base that prefers using Apple Pay for its convenience and security.
- Contactless Payments: With the growing emphasis on health and safety, contactless payments have become more important. Apple Pay supports this trend by allowing customers to make secure transactions without physically touching payment terminals.
- A High Level of Security: Apple Pay employs advanced security features such as tokenization and biometric authentication. These features ensure that sensitive payment information is never shared with merchants or stored on Apple servers.
Prerequisites to Set Up Apple Pay for WooCommerce
Before we get into the details of configuring Apple Pay in WooCommerce, let’s check out the requirements first.
- A fully functional WooCommerce Store.
- Square POS Account (If you don’t have one, click here to check out the signup process for a Square account.)
- Safari (web browser) —only to test your Apple Pay integration.
Once you have both requirements ready, follow the instructions in the section below to iterate Apple Pay in WooCommerce.
3 Easy Steps to Configure Apple Pay in WooCommerce
Step #1: Install and Activate the WC Shop Sync Plugin
To get started, you need to install and activate the WC Shop Sync plugin. This plugin not only just allows you to accept Apply to Pay payments, but you can also add Google Pay, Afterpay, Cash App payments, ACH Payments, etc.
On top of that, you can easily synchronize your customer information and order details and even instantly sync inventory between Square and WooCommerce.

To install and activate the plugin, follow these steps:
- Login to your WordPress dashboard as an administrator.
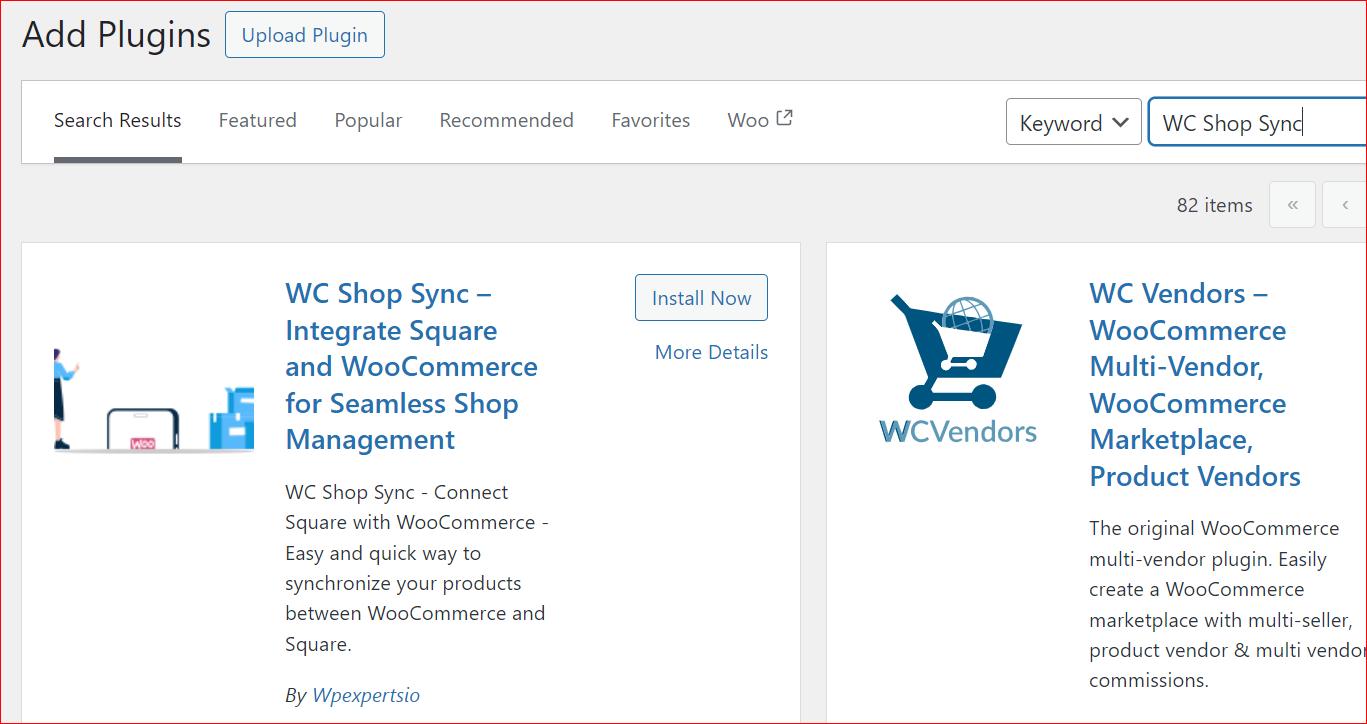
- Go to Plugins → Add New Plugin.
- In the search bar, type ‘WC Shop Sync’ and look for the ‘WC Shop Sync – Integrate…’ by WPExperts.

- Click ‘Install Now’ and then ‘Activate’ to enable the plugin.


Upon activation, you’ll see the screen below.
Step #2: Connect Your Square POS Account
Now, you need to connect your Square POS account to WooCommerce. Follow the steps below to connect your Square account:
- Click on the “Connect with Square” button in the plugin settings.
- If you are not already logged in, you will be redirected to the Square login page.
- Enter your Square account credentials and sign in.

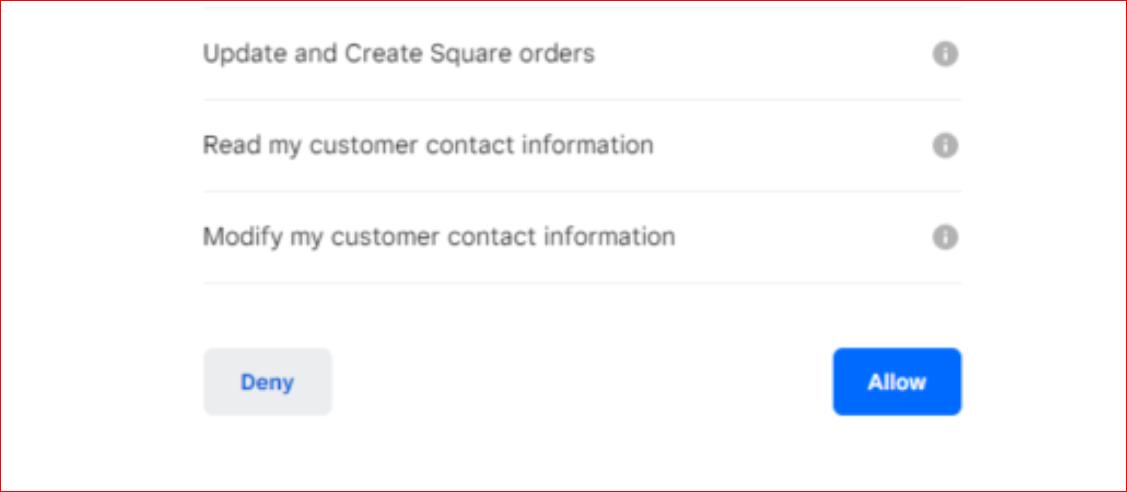
- Click ‘Allow’ to authorize the plugin to retrieve data from your Square account by allowing the necessary permissions.

- Finally, click on the “THAT’S MY SITE – REDIRECT ME” button to return to your website.


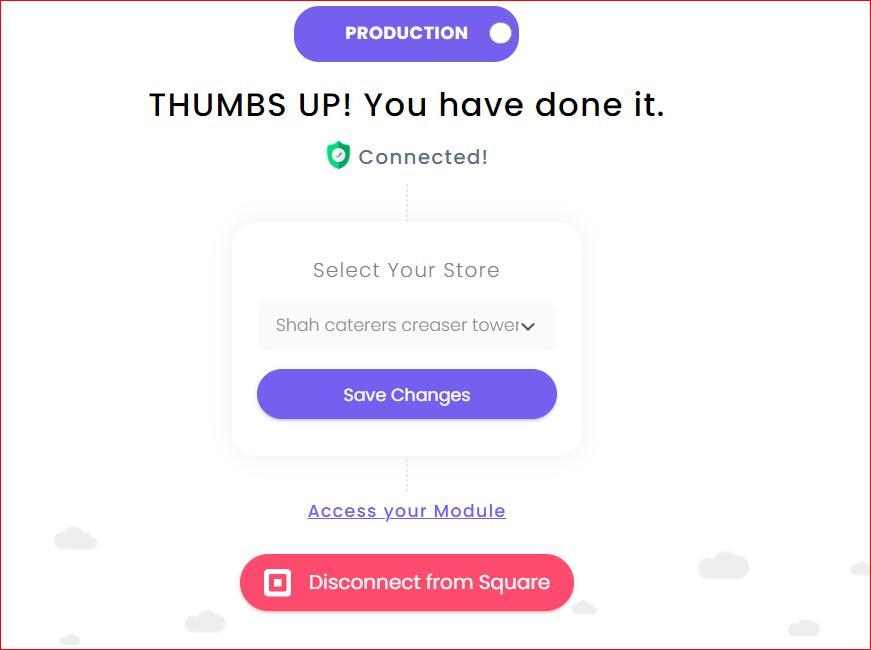
After successfully connecting your Square POS account with WooCommerce, you see the following screen where you need to select and save your WooCommerce store on which you want to configure Apple Pay.
Step #3: Enable Apple Pay for WooCommerce
Finally, you need to enable Apple Pay within WooCommerce to start accepting payments. Follow these steps to enable Apple Pay:
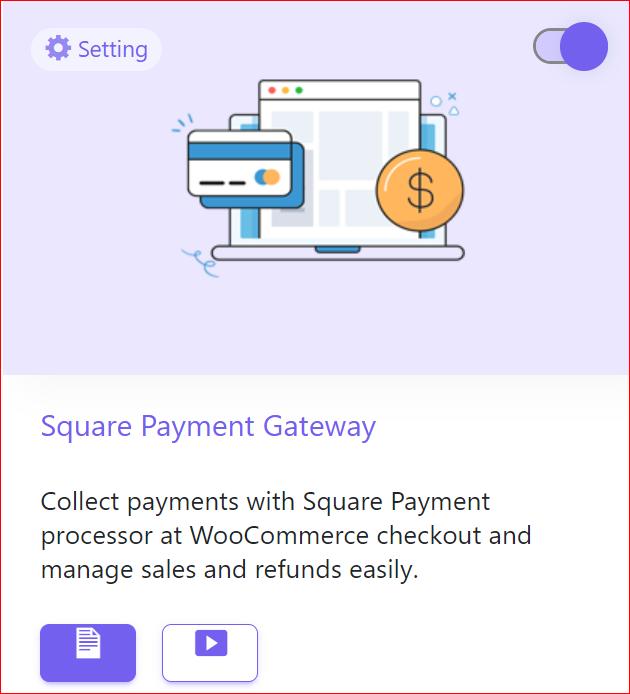
- In your WordPress admin panel, navigate to WC Shop Sync → Plugin Module.
- Toggle on the ‘Square Payment Gateway’ module.

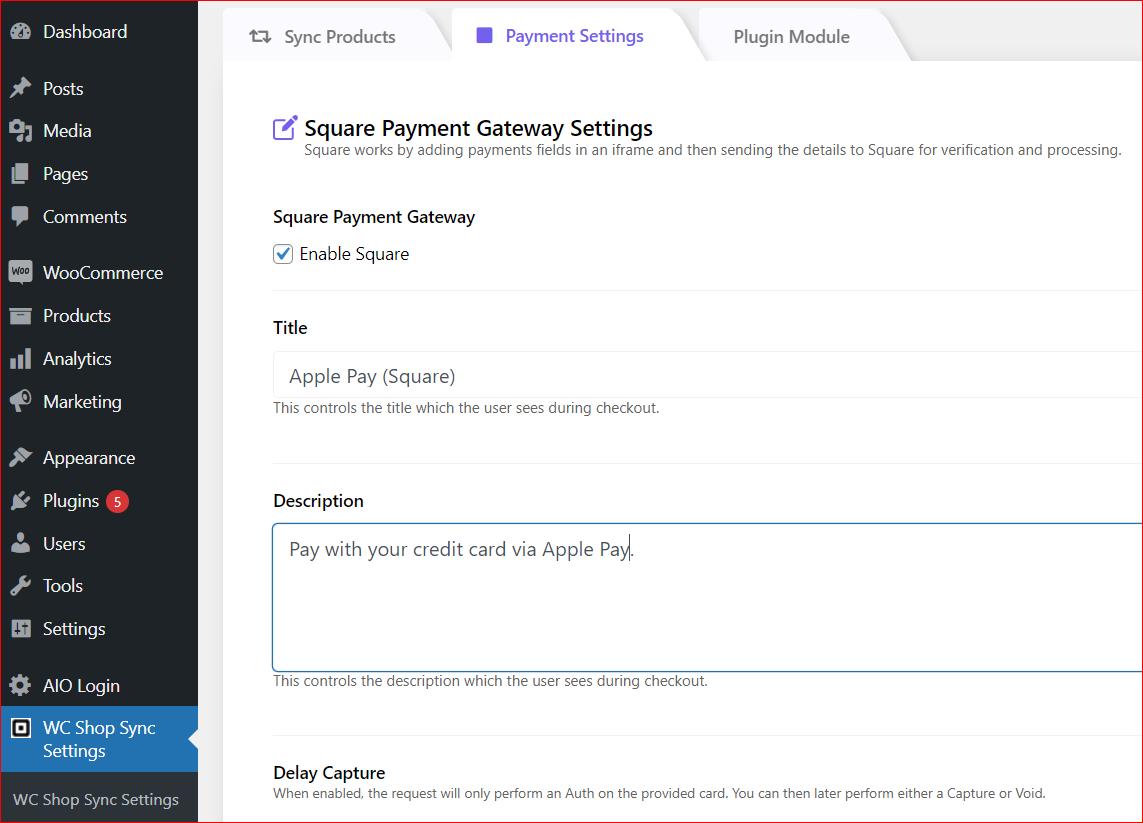
- Next, go to WC Shop Sync → Payment Settings.
- Check the “Enable Square” box.
- Customize the payment settings by specifying the title and description of the payment method.

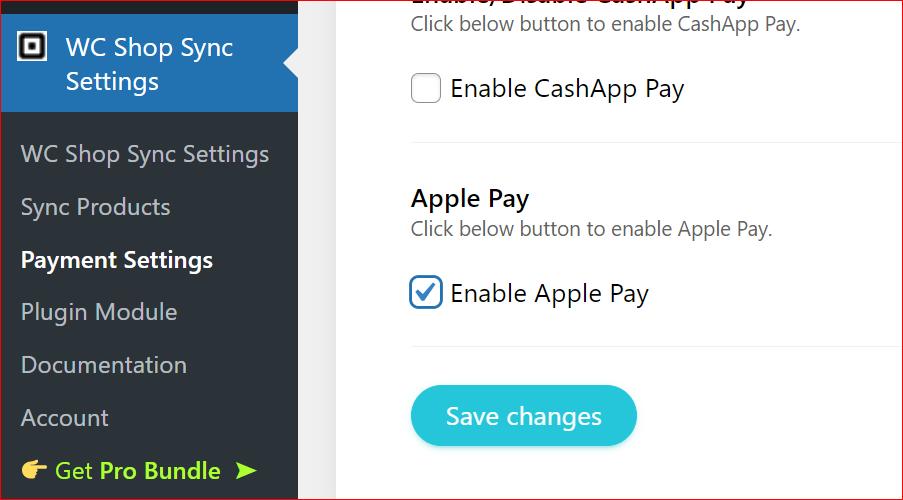
- Scroll down, then checkmark the “Enable Apple Pay option.
- Finally, click the ‘Save Changes’ button to save your changes.

Congratulations! You’ve now successfully set up Apple Pay in WooCommerce.
From now on, whenever someone visits the checkout page on your WooCommerce store, they will see the Apple Pay payment option, as shown below.
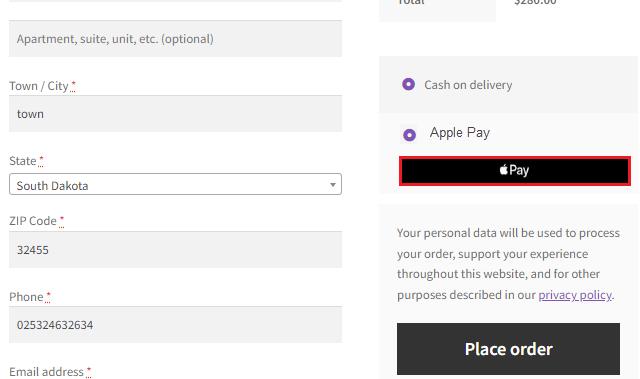
NOTE: As we told you earlier, Apple Pay will only function on the Safari browser. So, make sure you use Safari if you want to test the Apple Pay payment option.
Final Remarks on Apple Pay in WooCommerce
Setting up Apple Pay in your WooCommerce store is a smart move to improve the shopping experience for your customers. With its speed, security, and convenience, Apple Pay can help increase your conversion rates and customer satisfaction.
We hope you find the steps to set up Apple Pay in WooCommerce in the above guide simple and easy to follow.
Lastly, If you encounter any issues or need further assistance, feel free to reach out for help. We would love to help you!
Frequently Asked Questions
- Can I use Apple Pay on WooCommerce?
Yes, you can use Apple Pay on WooCommerce. While WooCommerce does not have a built-in plugin for Apple Pay, you can integrate it using third-party plugins like WC Shop Sync.
- How to enable Apple Pay for WooCommerce?
To enable Apple Pay for WooCommerce, you need to use the WC Shop Sync plugin. Install and activate the plugin, connect your Square POS account, and activate the Square Payment Gateway module. Then, customize your payment settings and enable the Apple Pay option.
- How do I set up Apple Pay on my WooCommerce store?
Setting up Apple Pay on your WooCommerce store involves three easy steps:
- Install and activate the WC Shop Sync plugin.
- Connect your Square POS account to WooCommerce.
- Enable Apple Pay in the payment settings of the WC Shop Sync plugin.
Follow these steps to offer Apple Pay as a payment option on your WooCommerce store.


