

Accepting online payments isn’t new in the eCommerce industry, nor is it something that requires extraordinary talent to set up. For those who have yet to explore this domain, there are plenty of options to choose from, including PayPal, Amazon Pay, Apple Pay, Google Pay, and Square.
What sets you apart from everyone else and their brand is how you use these payment methods on your website. One of the most efficient ways to use your online payment gateway is to connect it with contact forms that can easily be created and customized.
As the title suggests, we will be talking about one of the most popular payment methods ever, Square, and how it can be connected with WPForms.
This simple connection will enable users to pay for their orders, donations, and products using the robust and simple payment method.
Let’s get a little acquainted with WPForms and what it can do for you.
What is WPForms?
WPForms is a complete and comprehensive drag and drop WordPress form builder that is an easy and powerful WordPress plugin that enables you to create aesthetic contact forms, subscription forms, payment forms, and relevant forms for your website in minutes without writing any code or to hire any developer.
WPForms has been downloaded almost 500,000 times or vice versa. Since its launch in 2017-2020, it has rapidly increased its popularity with website bloggers, business personals, designers, and developers.
What is WPForms Square Plugin?
WPForm Square plugin is a WordPress addon that enables users to pay for their orders, donations, and products via the Square payment gateway.
This plugin assists you to create your form and add your Square payments settings so the users will be able to pay using the credit card number, so any of the products purchased using the WPForm will consist of an option for the users to pay using the credit card information and this payment will be integrated with the Square account.
WPForms Square plugin is also supported by sandbox with the latest test version of SQUARE V2 API to view test transactions in Square Dashboard.
Note: Square API is currently available for the US, Canada, Australia, Japan, and the UK.
Features of WPForms Square Plugin
The following are some of the features of the WPForms Square Plugin:
- Using this plugin, the user will have the option to integrate square payment configurations with each WPForm (i.e., each form consists of its Square payment settings)
- Add the Square Credit Card Pricing Field selected with WPForms.
Connecting WPForms with Square?
The following steps are required to connect WPForms with Square Payment Plugin:
Step # 1:
Click on the button “Connect Square” and follow the required instructions.

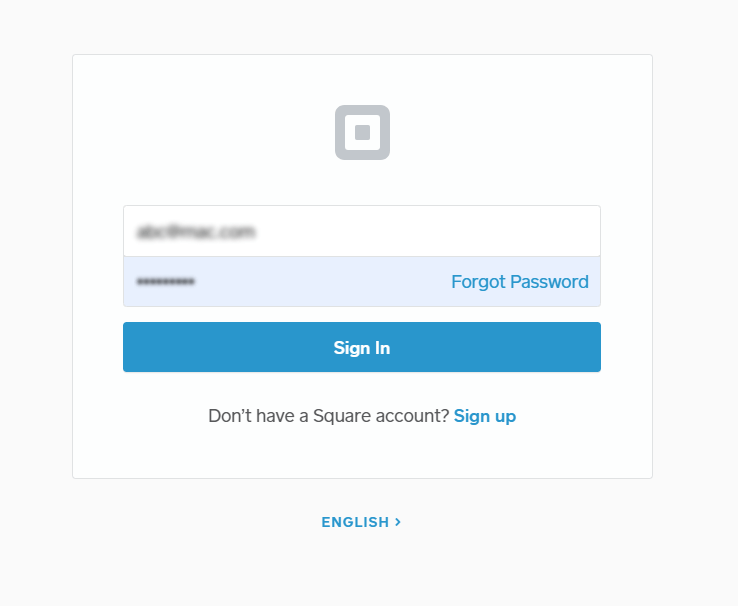
Step # 2:
Add the Square Application User and enter the password to Sign In.
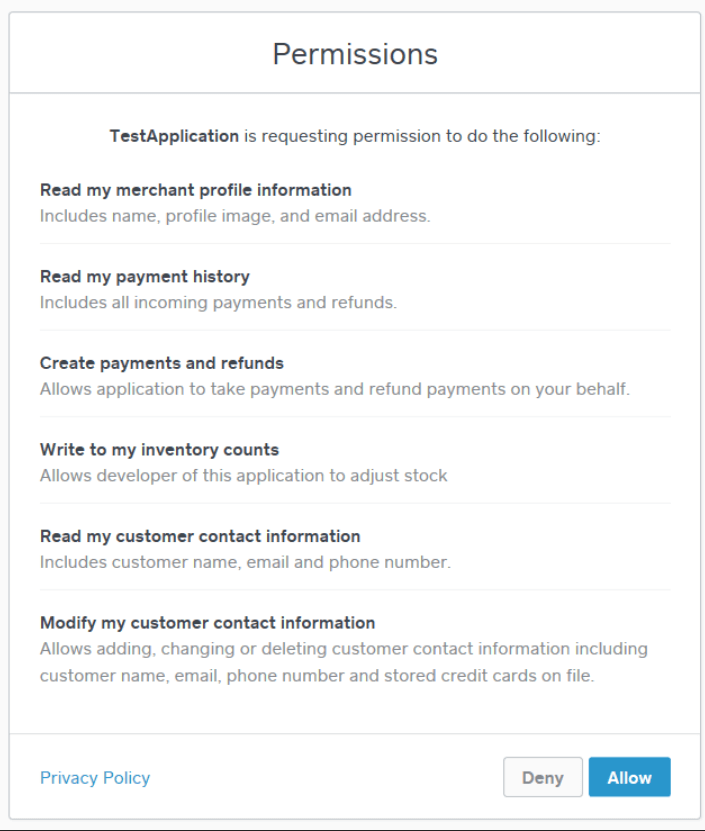
Step # 3:
Click on the “Allow” button to give the permission rights.
Step # 4:
You will be authorized by the Square account and will arrive on the APIExperts page, where you’ll see the option to get redirected back to the website.

Step # 5:
After you’re connected, select the location of your application form via the dropdown and click on ‘Save Changes.’
Step # 6
When editing WPForm, go to the payment option and click on the “Enable Square Payments Checkbox.”
Installation of WPForms?
Step # 1:
- Once you have downloaded the plugin, you can install it on your WordPress website.
- You will need to log in to your WordPress admin panel.
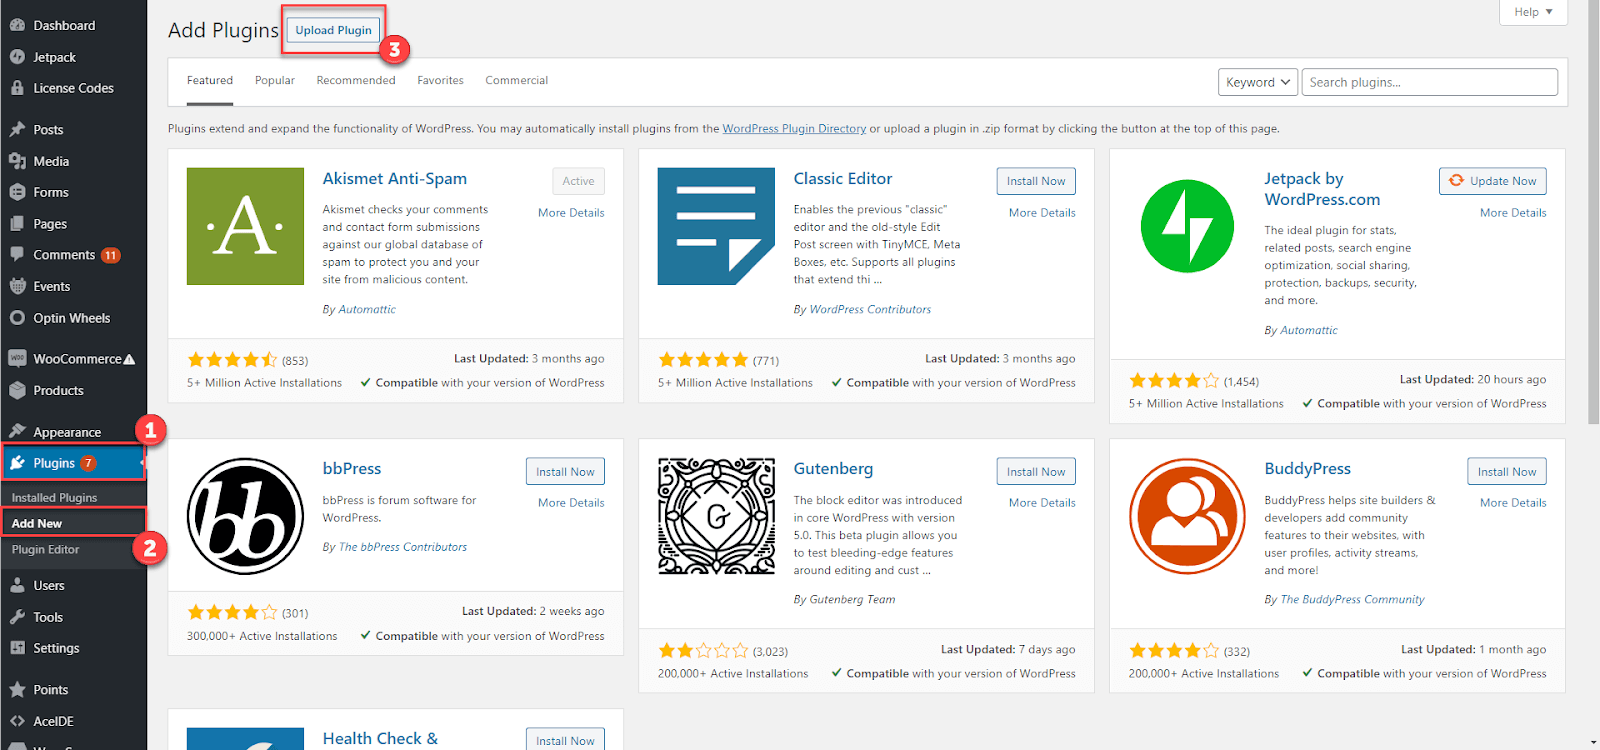
Step # 2:
- Click on the Plugins tab on the left side menu bar.
- Click on “Add New.”
- At the top of the page, you will see an upload plugin button; click there.
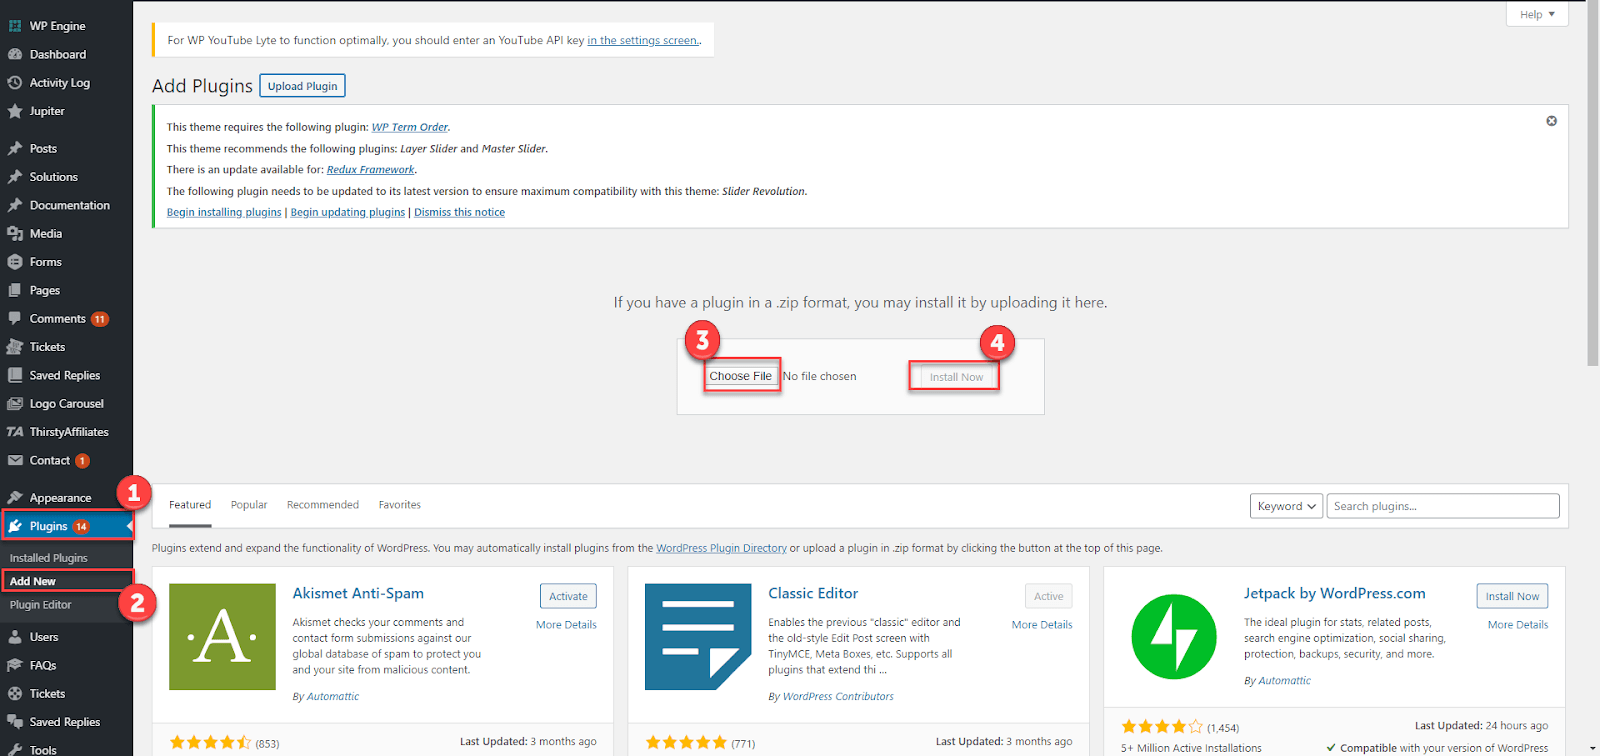
Step # 3:
- Click on the Choose file button in the box displayed below, select the WPForms, ZIP file from your directory.
- After you select the file, click on “install now”.

Step # 4
- After uploading the zip file, click on the “Activate Plugin” button.
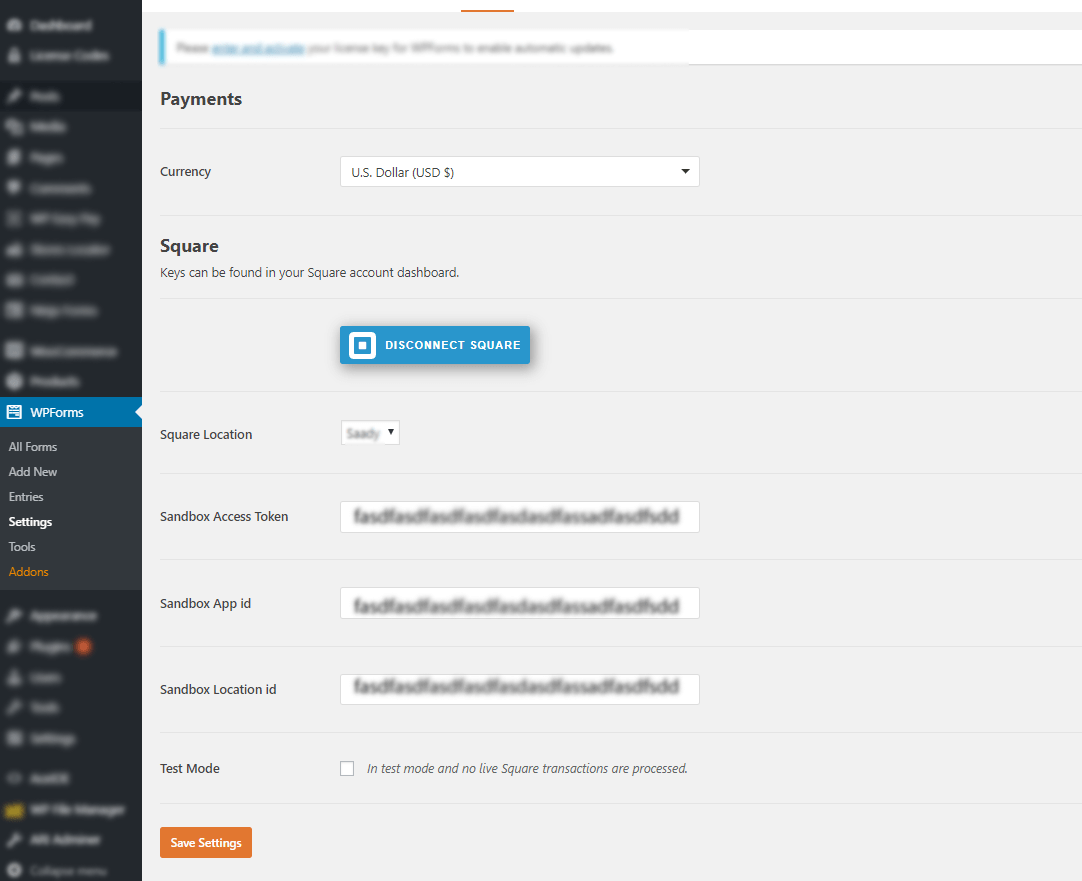
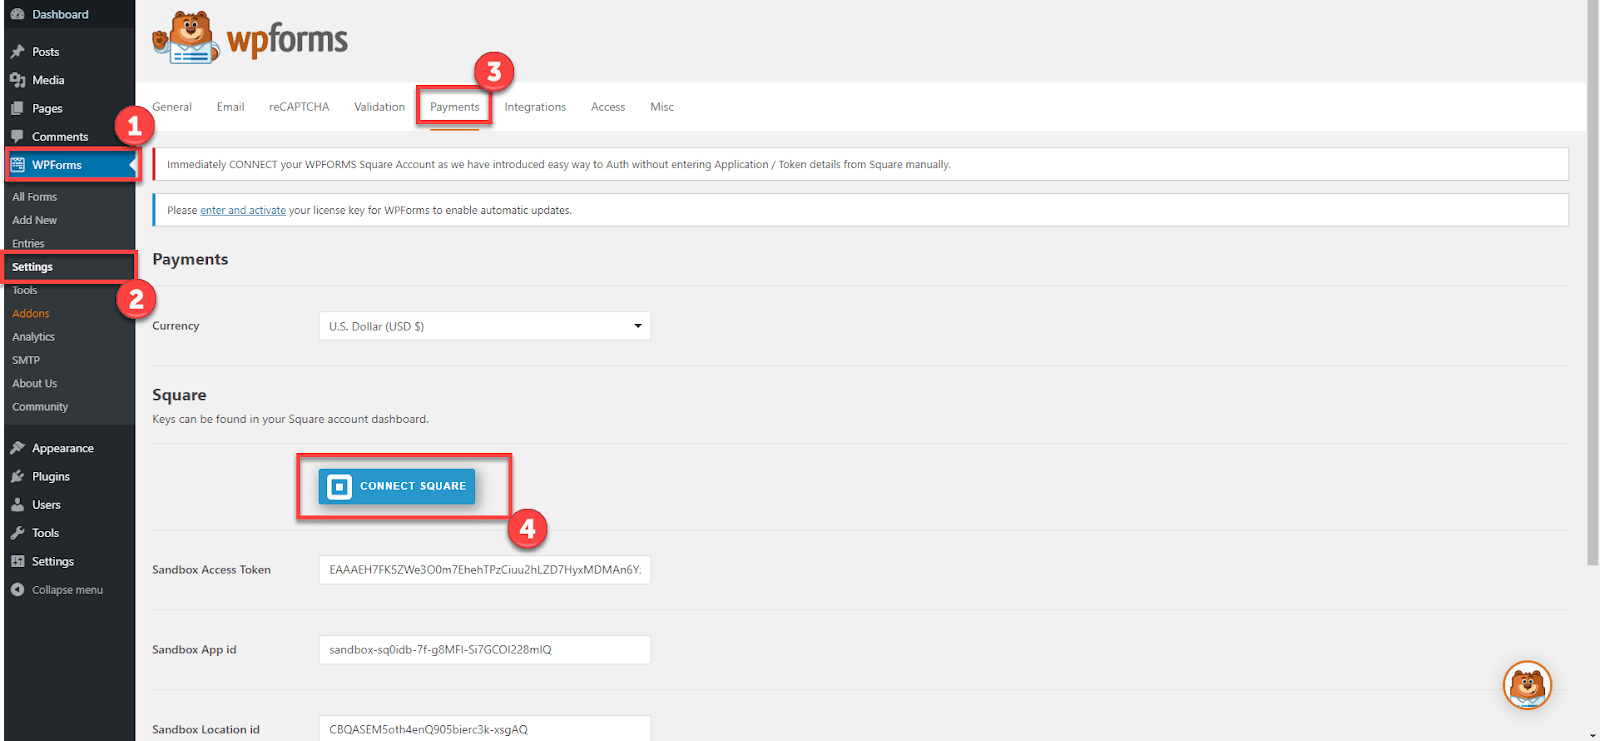
Setting up the WPForms Square Payment Settings
If you need to set up the WPForms Square Payment Settings, you need to follow the steps below:
Step # 1:
- Choose the WPForms in which the Square Payment Settings will be implemented. (WPForms Configurations > Square).
- Incorporate WPForm Square Payment Settings (Add testing and live payment configurations for the Square Payment Account).
- Add Square application settings to connect with WPForms that includes Token for Application ID – Location ID.
- Add Square application test mode configurations via testing credit card that must be processed via the data, as shown in the figure below.
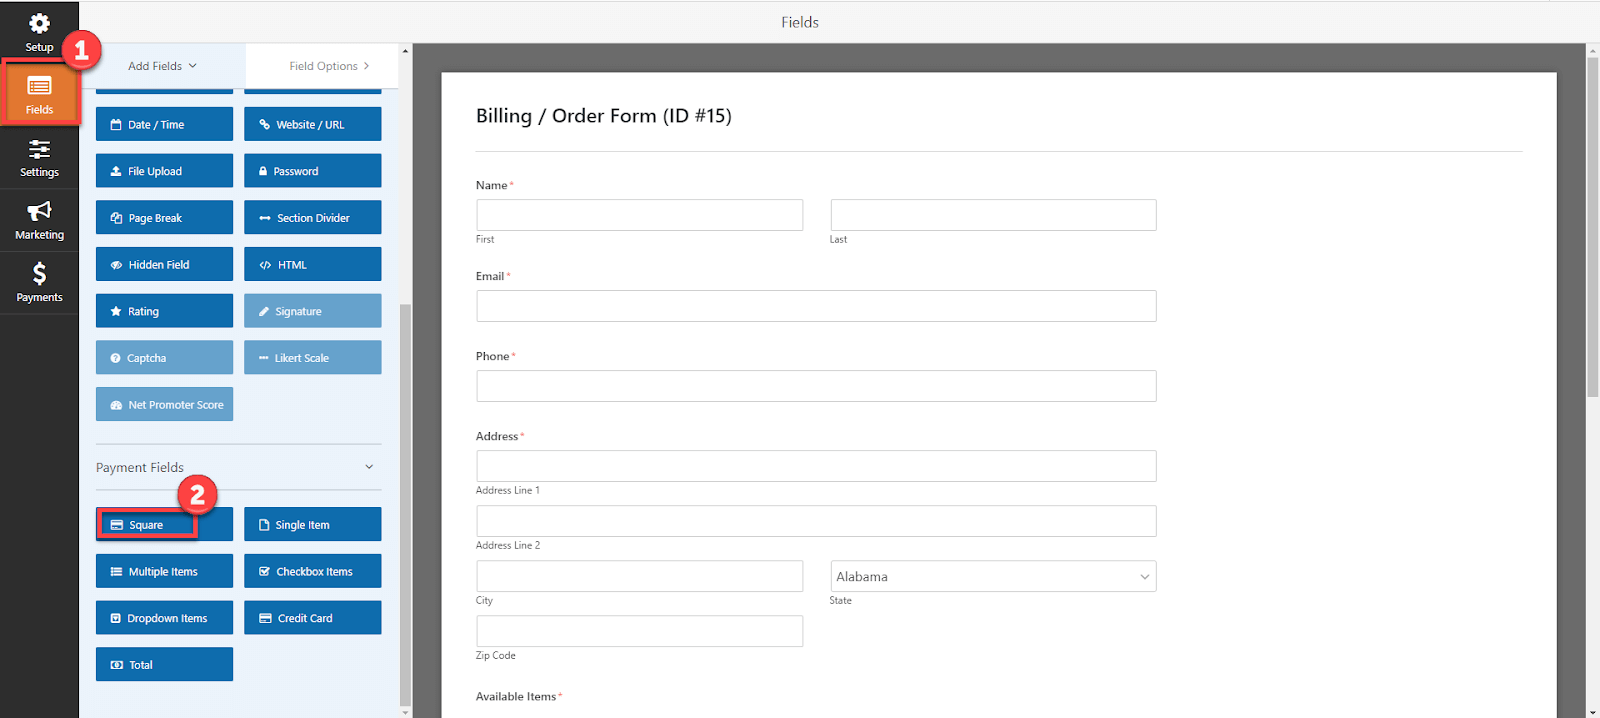
Add WPForm Square Fields Settings
Following are steps are required to add WPForm Square Fields Settings:
Step # 1:
- You can easily add any form.

Step # 2:
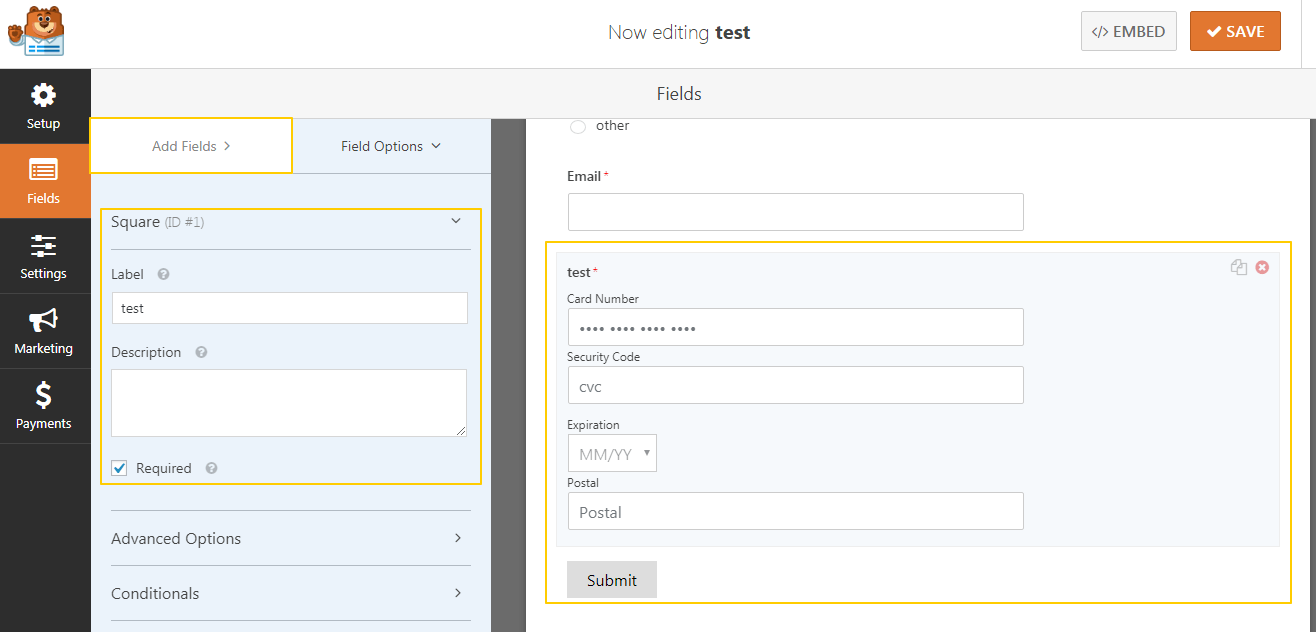
- Users can add WPForm Square Payment Field (Only Add Square Payment Field).
Step # 3:
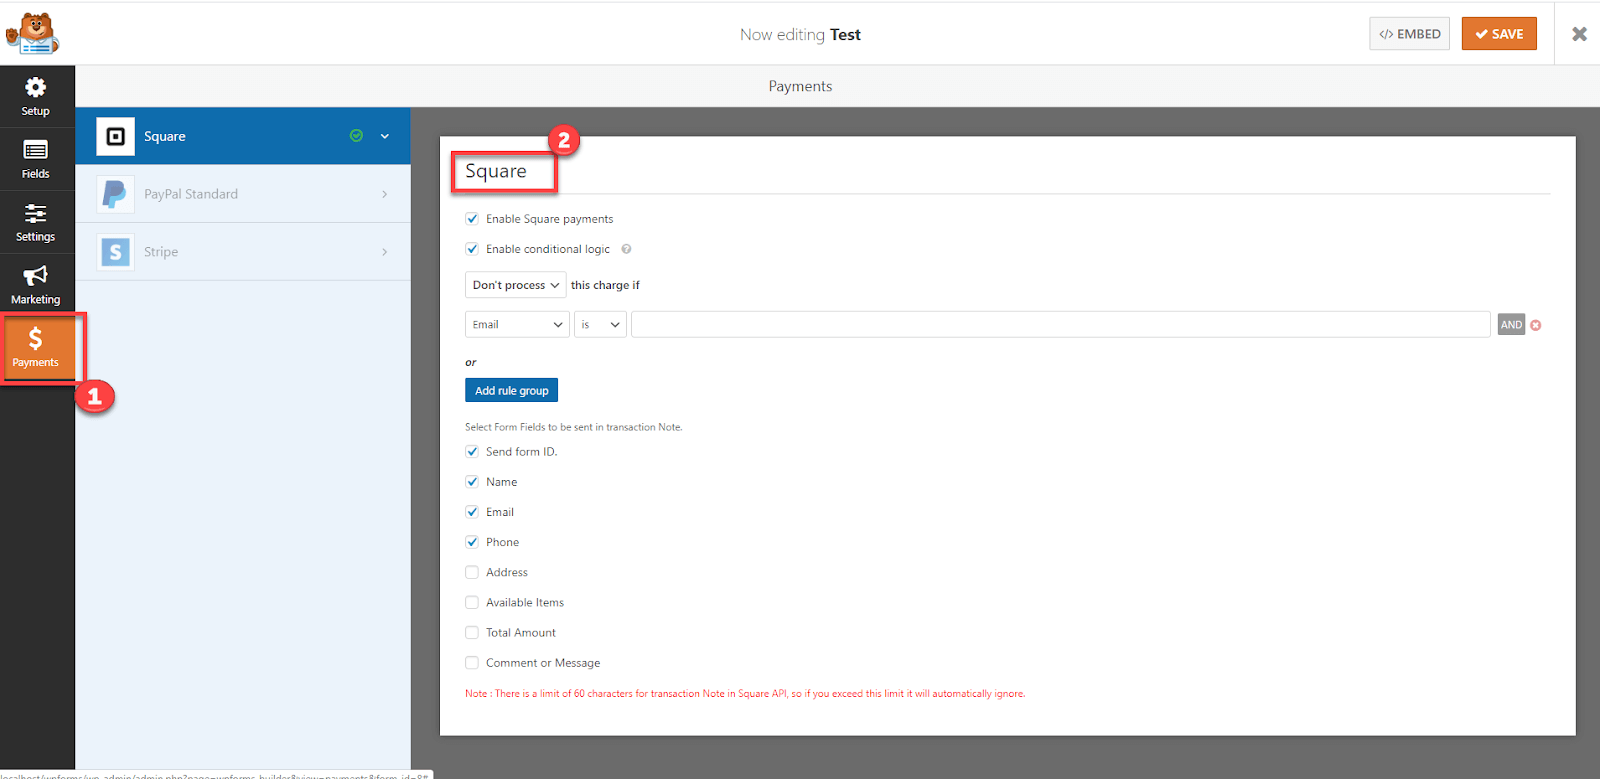
- You can also send specific form fields in transaction notes, as there is a particular limit of only 60 characters on the transaction notes from Square Dashboard. Also, only the field values will be reflected in the Square Dashboard (labels will not reflect).
Step # 4:
Adjust WPForms Square Field Settings (Label – Description – Required Field)
Step # 5
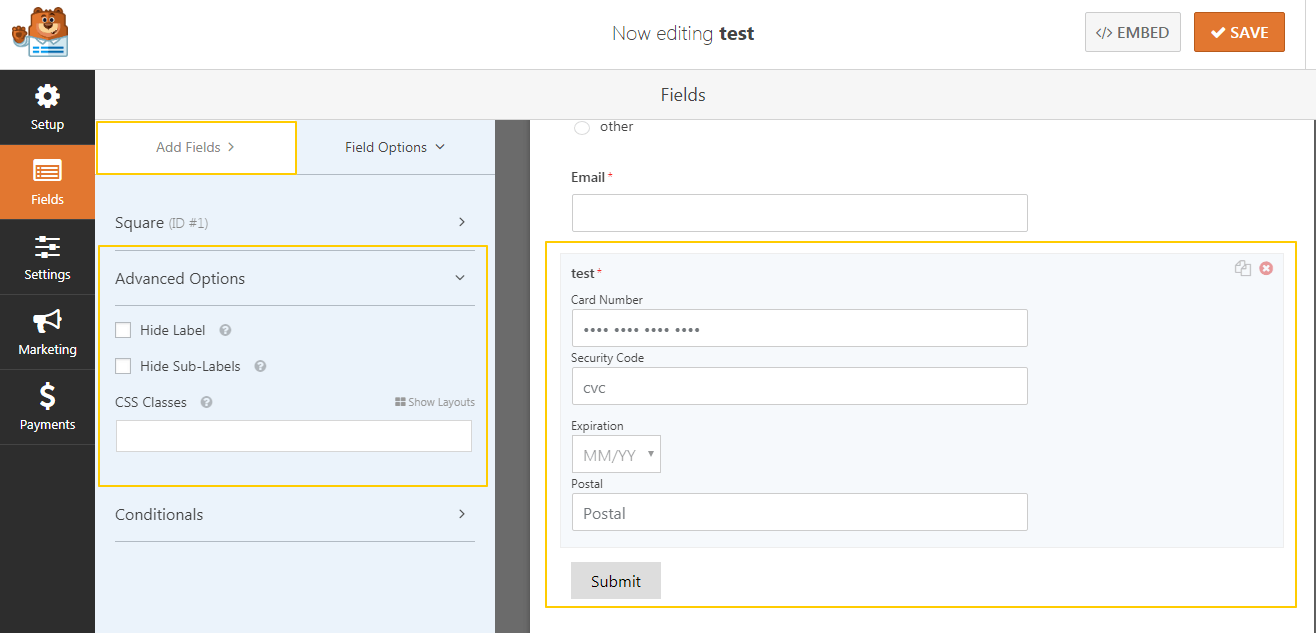
- Adjust WPForm Square field configurations with advanced options.
- Hides the form label, fields, and sub-labels. You can also add a CSS class.
Step # 6:
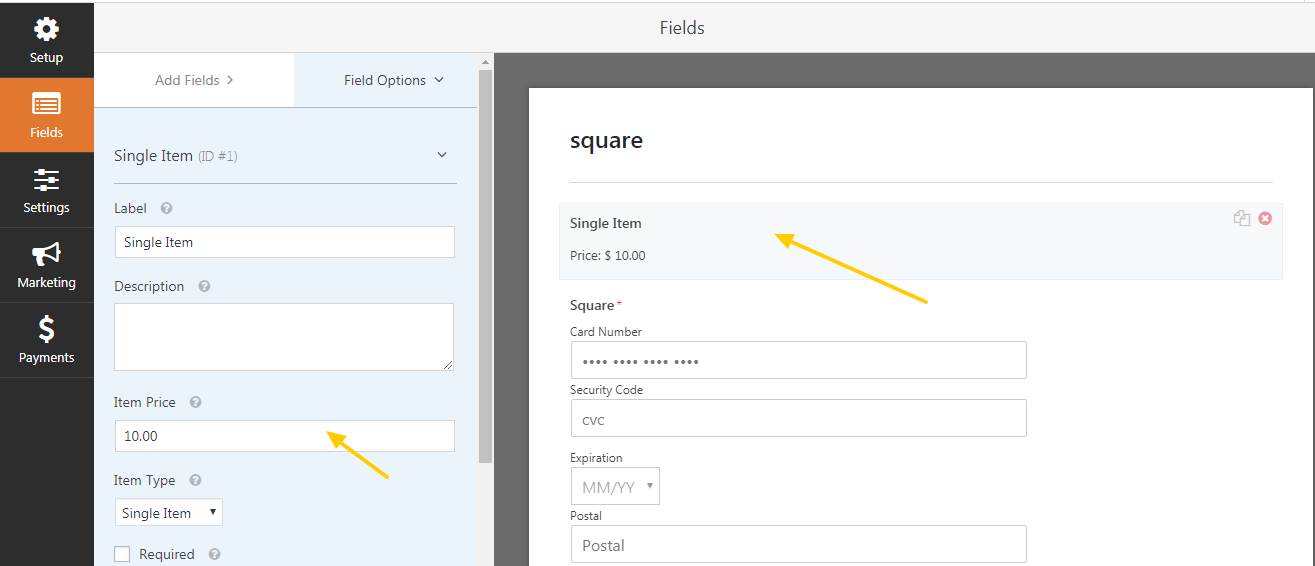
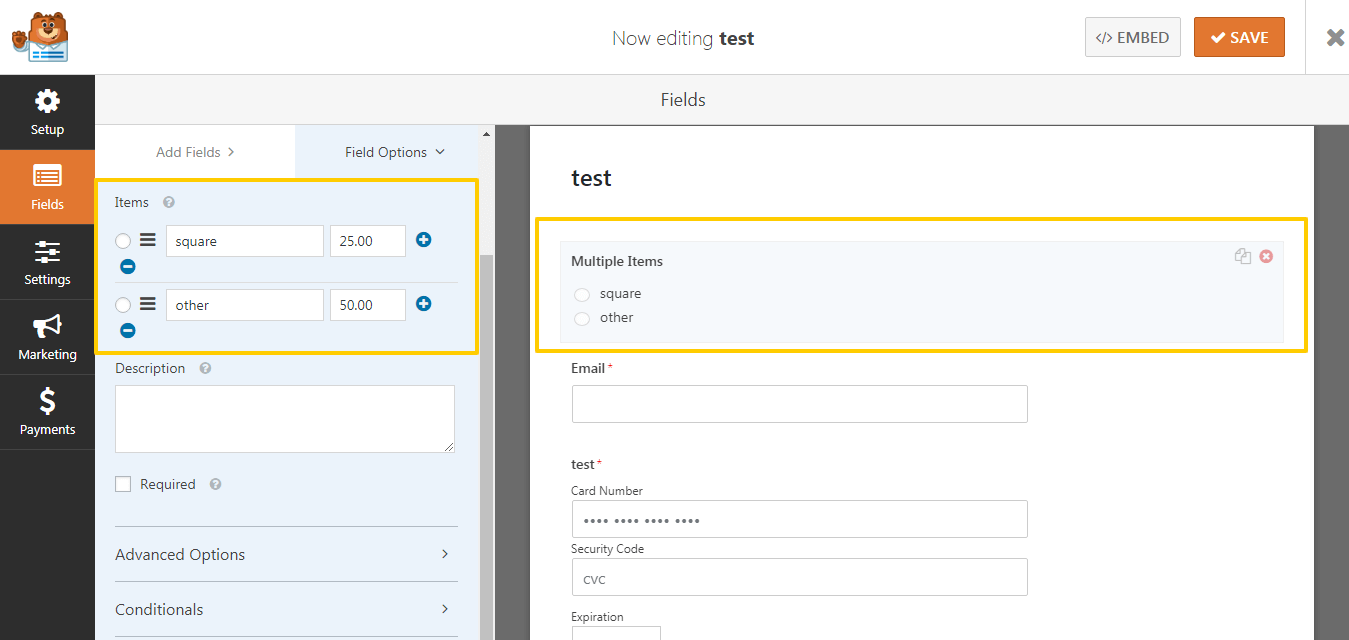
- Adjust form price field.
Step # 7:
- Adjust WPForm Square Field configurations.
- Incorporate fields with the conditional logic; payments will be dependent on various conditions.
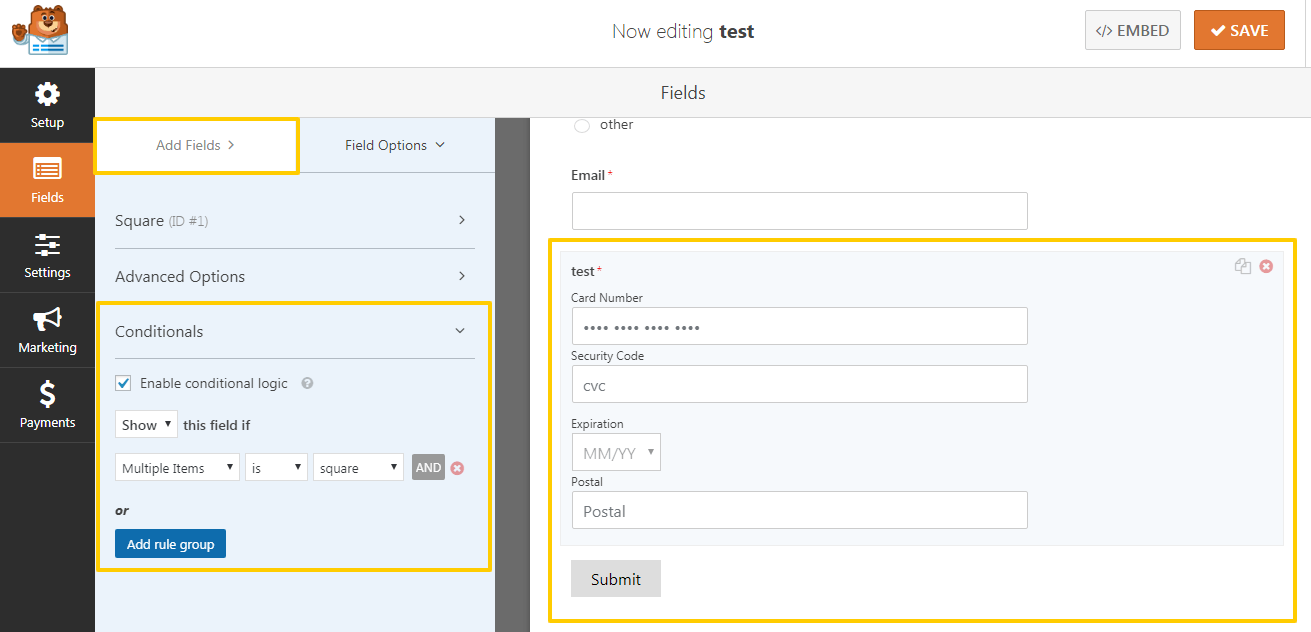
Step # 8:
Implement Fields with Conditional Logic.
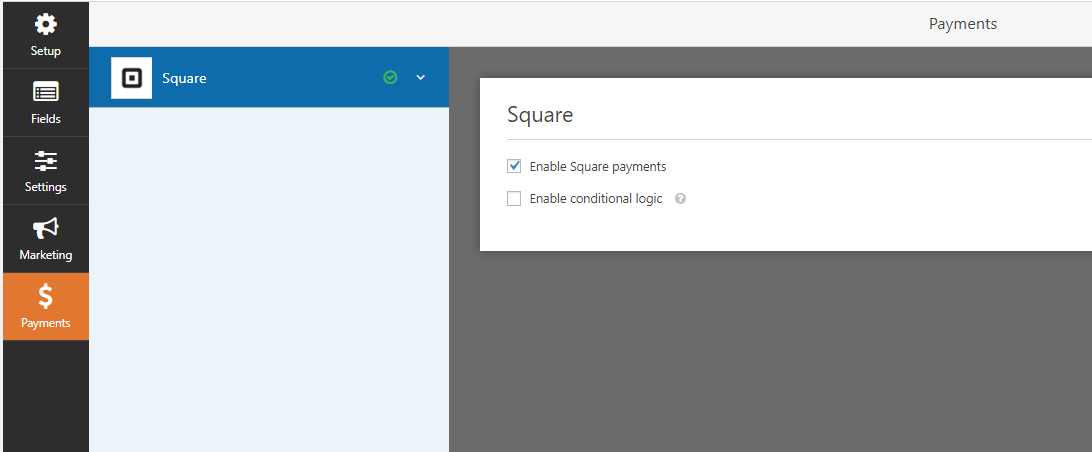
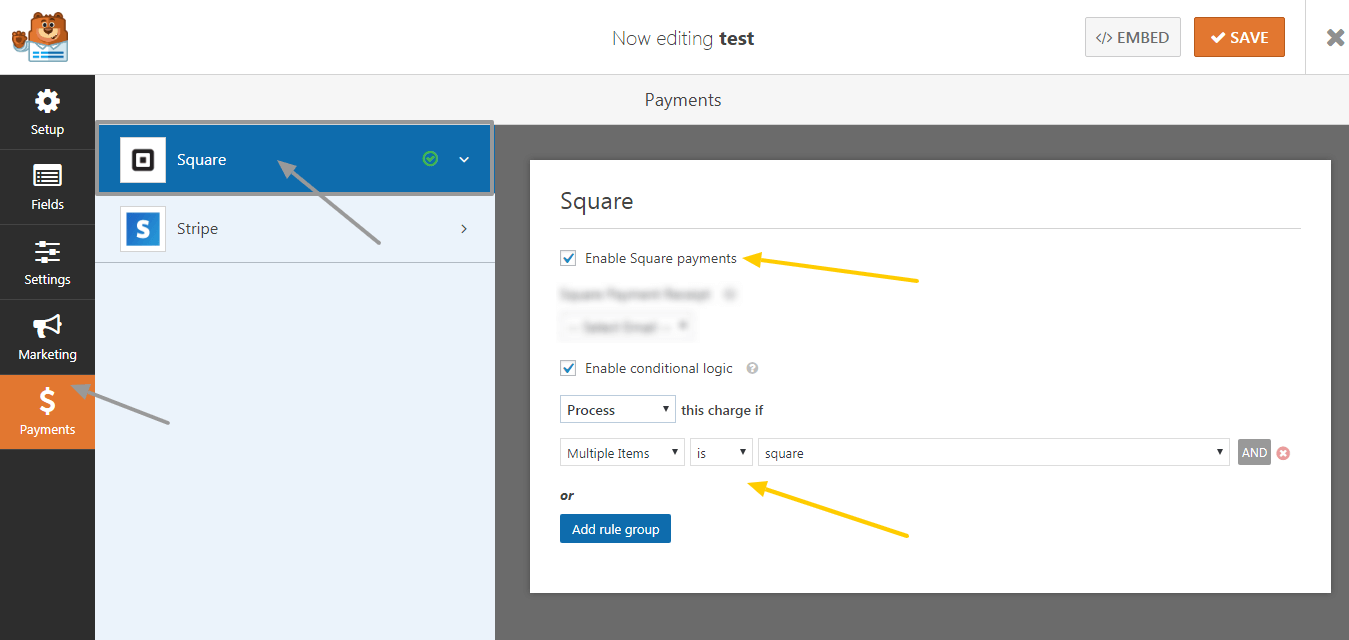
Enabling Square Payment Per Form and Allow Conditional Logic Settings:
Step 1:
- Select payment tabs per each form -> choose “Square.”
- Allows users to enable Square payment per each form.
- Implement conditional logic option to process or not process any payments.
Step # 2:
- View the list of orders per each form from 2 locations.
- Select the entries tab -> filter form.
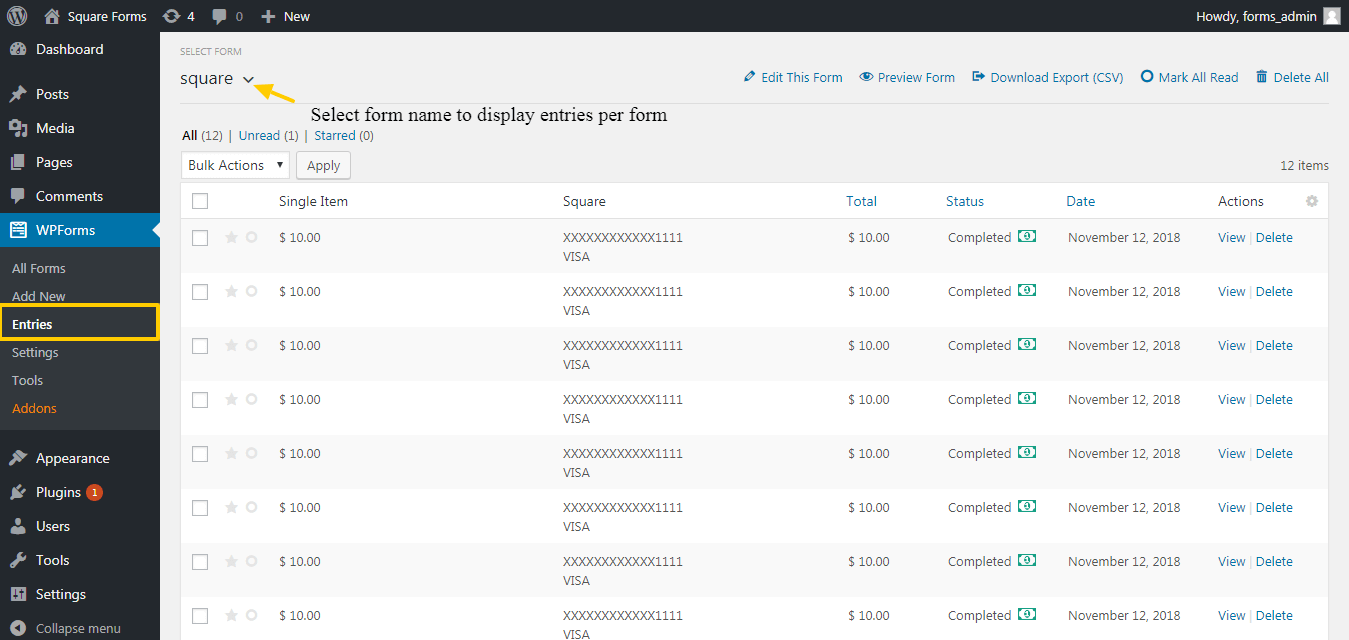
Step # 3:
- Select the form -> Select the entries.

Step # 4
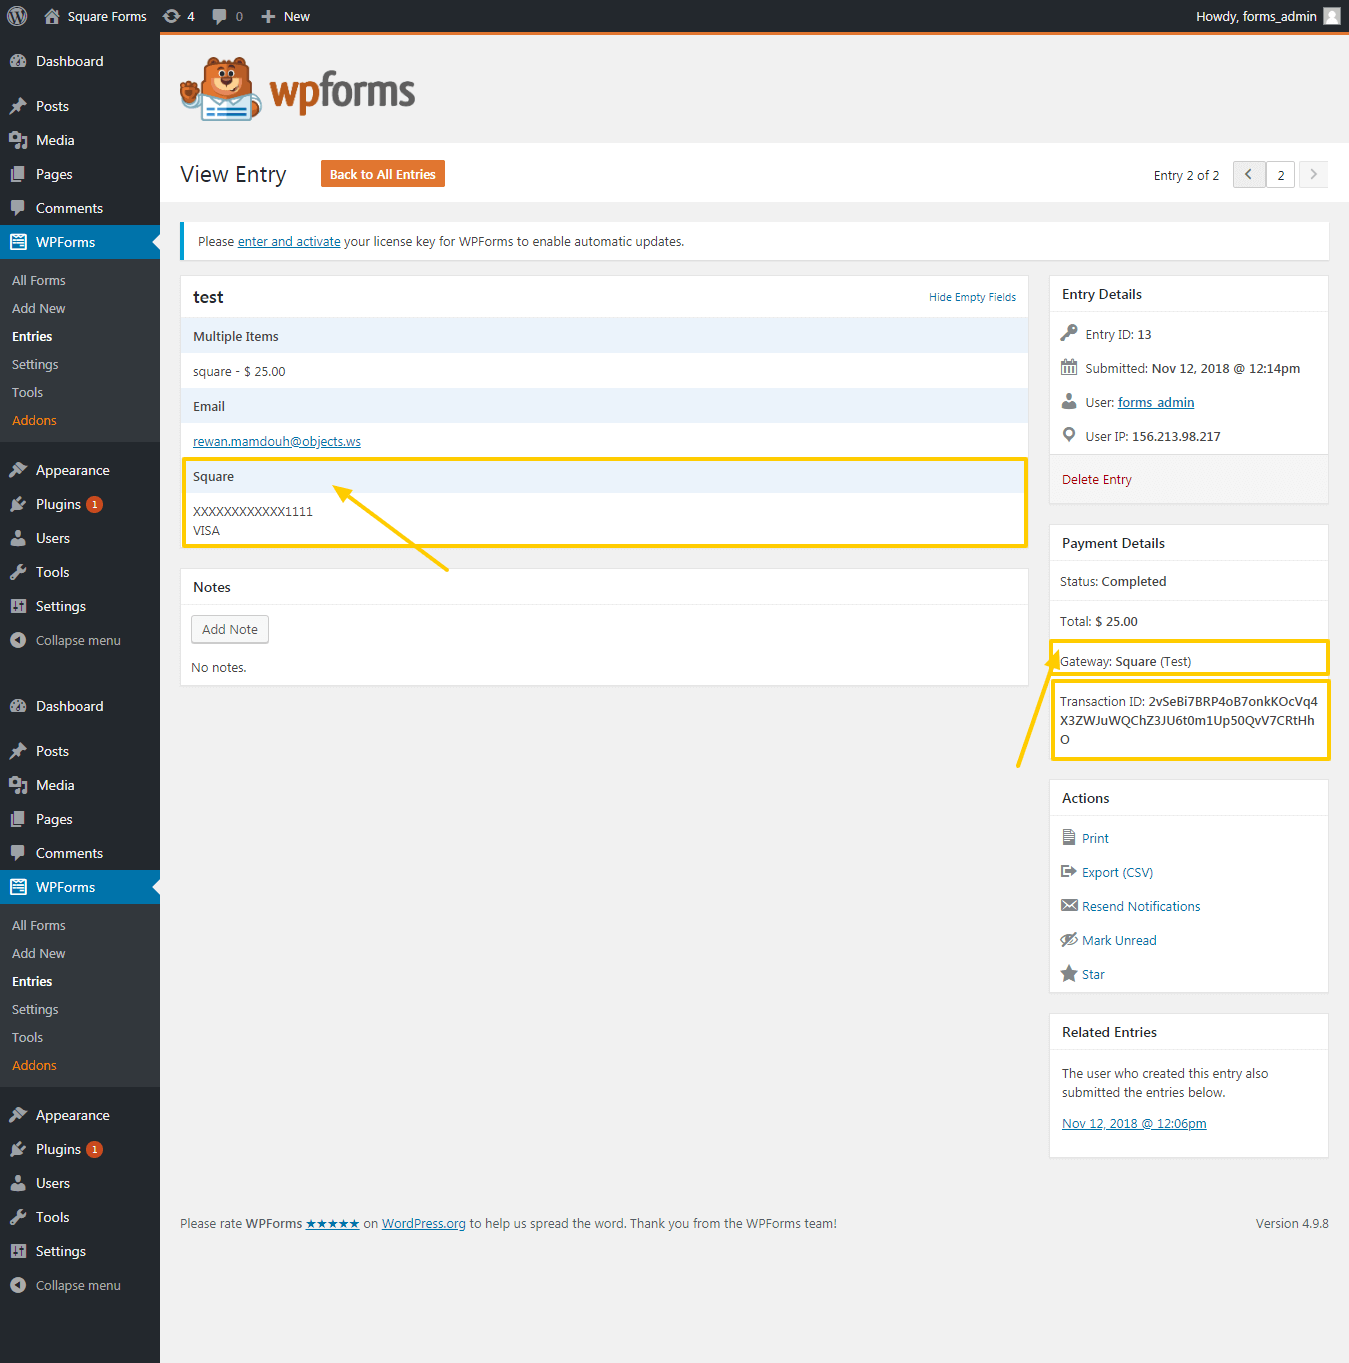
- The order details with Square Payment Type and Transaction ID information.
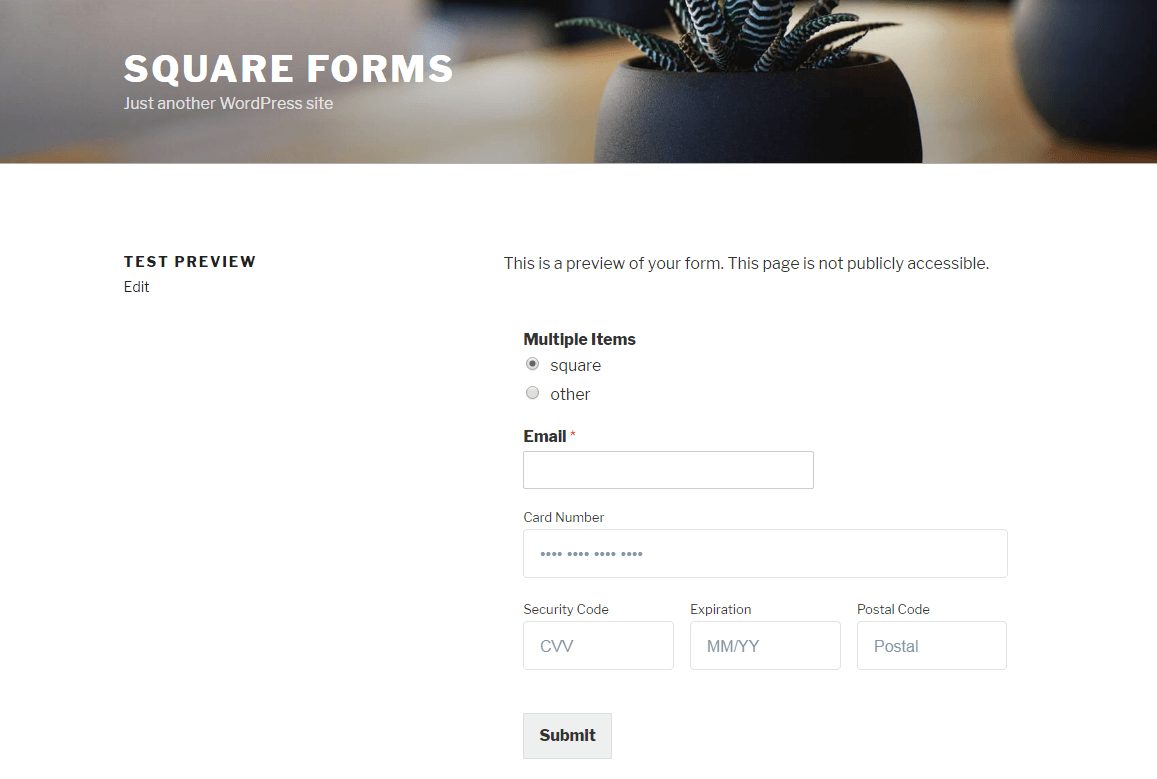
Form Preview in Front End
To know more. Read the technical documentation here.


